Have you ever wanted to achieve a natural and effortless look with your makeup, but without spending hours in front of the mirror? Look no further – we have the perfect solution for you! In this article, we will guide you on how to create a stunning and natural makeup look in just two minutes. Say goodbye to complicated and time-consuming routines, and say hello to a fresh and flawless face that will have everyone wondering how you do it. Get ready to simplify your beauty routine without sacrificing the impact with these quick and easy steps.
Check here to see how this cup of morning coffee will bright your whole day!!
Choosing the Right Products
Identify your skin type
Before starting any makeup routine, it’s essential to identify your skin type. Knowing whether you have oily, dry, combination, or sensitive skin will help you choose products that suit your specific needs. If you’re unsure, consult a skincare professional or do some research to determine your skin type.
Select a lightweight foundation or tinted moisturizer
When aiming for a natural look, opt for a lightweight foundation or tinted moisturizer. These products provide sheer to light coverage, allowing your skin to shine through while evening out your complexion. Look for formulas that offer natural finishes and blend seamlessly with your skin tone for a more effortless feel.
Opt for a creamy concealer
To cover any blemishes, dark circles, or redness, choose a creamy concealer that matches your skin tone. Creamy concealers provide a smooth application, allowing you to blend them easily into your skin. Dab a small amount onto problem areas and blend it out gently with your fingers or a blending brush for a seamless finish.
Choose a neutral-toned blush
Blush adds a youthful flush to your cheeks, giving your face a healthy glow. Opt for a neutral-toned blush that complements your skin tone. Peachy, rosy, or coral shades are great options for a natural look. Apply the blush to the apples of your cheeks using a fluffy brush and blend it towards your hairline for a subtle pop of color.
Pick a natural-looking eyeshadow palette
When it comes to eyeshadow for a natural look, choose a palette with neutral and earthy tones. These shades mimic the natural shadows and contours of your eyes, enhancing their beauty without appearing too dramatic. Apply a light neutral shade all over your lid, add a slightly darker shade to your crease for depth, and highlight your brow bone with a light shade for a fresh and awake look.
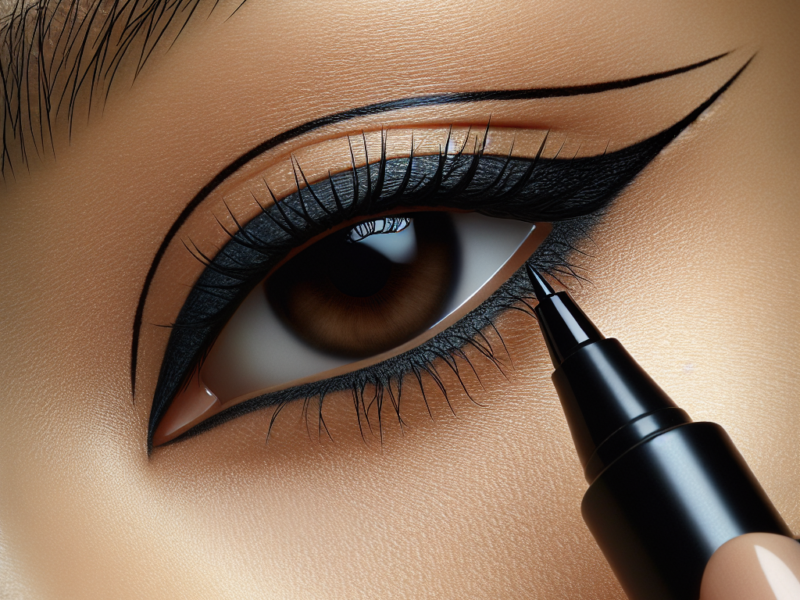
Opt for a lengthening mascara
To make your eyes pop without going overboard, opt for a lengthening mascara. Lengthening formulas give your lashes a natural lift and create the illusion of longer, fluttery lashes. Apply the mascara to both the top and bottom lashes, wiggling the wand from the roots to the tips for a defined and natural finish.
Select a tinted lip balm or lipstick
Finish off your natural look with a tinted lip balm or lipstick. Choose a shade that is close to your natural lip color for a effortlessly beautiful result. Tinted lip balms provide a sheer wash of color and moisturize your lips, while lipsticks offer more pigmentation. Apply the product and blot any excess for a natural, just-kissed finish.
Prepping the Skin
Cleanse and moisturize the face
Before applying any makeup, it’s crucial to cleanse and moisturize your face. Start by using a gentle cleanser to remove any dirt, oil, or impurities. Follow up with a lightweight moisturizer that suits your skin type. Moisturizing helps create a smooth canvas for your makeup and ensures your skin stays hydrated throughout the day.
Apply a primer for smooth application
A primer is the secret weapon for creating a flawless base. Apply a thin layer of primer after moisturizing to fill in any fine lines, blur imperfections, and help your makeup last longer. Look for a primer that suits your skin type, whether it’s for mattifying, hydrating, or pore-minimizing purposes. Smooth it onto your skin using your fingers or a brush to create an even surface for foundation application.
Use a color correcting concealer if needed
If you have specific skin concerns like redness or dark spots, consider using a color correcting concealer. Color correctors come in various shades and help neutralize specific discolorations on your face. For example, green color correctors counteract redness, while peach or orange ones counteract dark circles. Apply the color corrector sparingly on problem areas before applying your regular concealer and foundation.
Creating a Flawless Base
Apply a lightweight foundation or tinted moisturizer evenly
To create a flawless base, start by applying a lightweight foundation or tinted moisturizer. Using your fingers or a brush, dot the product onto your forehead, cheeks, nose, and chin. Make sure to choose a shade that matches your skin tone to achieve a more natural look. Then, blend the foundation or tinted moisturizer using circular motions, gently working it into your skin for a seamless and even coverage.
Blend in the product using a beauty blender or brush
To achieve a more airbrushed finish, use a beauty blender or a buffing brush to blend the foundation or tinted moisturizer into your skin. Dampen the beauty blender and bounce it lightly over your face, blending the product until it merges seamlessly with your skin. If using a brush, swirl it in circular motions, working the product into your skin for an even and natural-looking base.
Conceal any blemishes or under-eye circles
After applying the foundation or tinted moisturizer, it’s time to conceal any blemishes, acne scars, or under-eye circles. Take a small amount of creamy concealer and dot it onto any areas that need extra coverage. Gently blend the concealer with your finger or a brush until it seamlessly merges with the foundation, providing a natural-looking finish.
Enhancing the Eyes
Apply a neutral eyeshadow all over the lid
To enhance your eyes and create depth, start by applying a neutral eyeshadow all over your lids. Choose a shade that matches your skin tone or a shade slightly lighter for a subtle brightening effect. Using an eyeshadow brush or your finger, sweep the color from your lash line to your brow bone, ensuring an even application.
Add depth with a slightly darker shade in the crease
To add dimension and depth to your eyes, apply a slightly darker eyeshadow shade in the crease. Use a blending brush to softly blend the color back and forth in the crease, focusing on the outer half of your eye. This technique creates a subtle contour effect and enhances the natural shape of your eyes.
Highlight the brow bone with a light shade
Highlighting the brow bone can give your eyes an instant lift and make them appear more awake. Choose a light eyeshadow shade that is a few shades lighter than your skin tone. Apply the shadow directly underneath your eyebrow arch, extending from the inner corner to the outer corner. Blend the color gently using a fluffy brush for a seamless transition.
Curl your lashes for an open-eyed look
Curling your lashes instantly opens up your eyes, making them appear larger and more awake. Use an eyelash curler and position it as close to the base of your lashes as possible. Gently squeeze the curler for a few seconds and release. Repeat this step if necessary, and be careful not to tug or pull on your lashes.
Apply mascara to the top and bottom lashes
Mascara is the final touch to enhance your eyes and make your lashes stand out. Choose a lengthening mascara, as mentioned earlier, and apply it to both your top and bottom lashes. Wiggle the wand from the roots to the tips of your lashes to ensure even coverage. This step adds volume and definition to your lashes while still maintaining a natural look.
Adding a Touch of Color
Choose a neutral-toned blush that complements your skin tone
Now it’s time to add a touch of color to your cheeks. Choose a neutral-toned blush that complements your skin tone. Rosy pinks, peaches, or soft mauves work well for a natural look. Avoid anything too shimmery or bright, as the goal is to achieve a subtle and natural flush.
Apply the blush to the apples of your cheeks
Using a blush brush, lightly dust the blush onto the apples of your cheeks. Smile to locate the area where your cheeks naturally round up. Apply the blush in a circular motion, blending it upwards towards your hairline. This technique creates a natural flush and adds a healthy, youthful glow to your complexion.
Blend it using a fluffy brush for a natural flush
To ensure the blush looks seamless and natural, blend it well using a fluffy brush. This step softens any harsh edges and ensures the color blends into your skin, creating a natural flush. Gently sweep the brush over the blush, diffusing the color for a more subtle and natural appearance.
Defining the Brows
Brush the brows to reveal their natural shape
Well-groomed eyebrows frame your face and give it structure. Start by brushing your brows upward using a spoolie brush or a clean mascara wand. This step reveals their natural shape and helps you see where you need to fill in any sparse areas.
Fill in any sparse areas using a brow pencil or powder
To define your brows, use a brow pencil or powder that matches your natural hair color. Start by lightly filling in any sparse areas, using short, feather-like strokes to mimic the appearance of natural brow hairs. Focus on the tail and sparse spots, gradually working towards the front of your brows for a more natural look.
Blend the color with a spoolie brush
To create a more natural and seamless brow appearance, use a spoolie brush to blend the color. Comb through your brows gently, brushing the product in the direction of hair growth. This step helps soften any harsh lines and ensures a more polished and natural finish.
Finishing Touches
Apply a tinted lip balm or lipstick
To complete your natural look, choose a tinted lip balm or lipstick that enhances your lips’ natural color. Opt for shades that are close to your own lip color, such as soft pinks, nudes, or mauves. Apply the product directly onto your lips, starting from the center and working your way towards the outer corners.
Choose a shade close to your natural lip color
When selecting a tinted lip balm or lipstick, it’s best to go for shades that are similar to your natural lip color. This choice ensures a more natural and effortless finish, enhancing your lips’ beauty without overpowering them. You want your lips to look fresh and just slightly enhanced.
Blot excess product for a natural finish
For a more natural and long-lasting finish, gently blot your lips with a tissue to remove any excess color and to set the product. This step helps the lip color to stay in place while maintaining a soft and natural appearance. Now you’re ready to rock your two-minute natural makeup look!
Quick Tips for Efficiency
Organize your makeup products in a streamlined manner
To streamline your makeup routine and save time, organize your products in a way that is easy to access and navigate. Arrange them in a designated makeup bag or drawer, categorizing them based on their function, such as face products, eye products, and lip products. This organization makes it quicker to find what you need and cuts down on searching time.
Invest in multitasking products
To simplify your routine, invest in multitasking products that can serve multiple purposes. For example, a lip and cheek tint can double as both a blush and a lip color. This way, you can cut down on the number of products you need to use and still achieve a natural look.
Use your fingers for quick and easy application
When you’re short on time, using your fingers can be a quick and efficient way to apply your makeup. Your fingers can warm up products and help melt them into your skin for a seamless finish. They’re especially useful for applying cream products like concealer or blush, allowing you to blend them in with ease.
Keep a travel-sized makeup bag for on-the-go touch-ups
For those busy days when you’re constantly on the go, it’s helpful to have a travel-sized makeup bag with essential products for touch-ups. Include items like a compact powder, a mini blush, a lip balm or lipstick, and a small brush or spoolie. This way, you can refresh your makeup quickly and effortlessly, maintaining your natural look throughout the day.

Maintaining a Natural Look
Avoid heavy-handed application of products
When aiming for a natural look, it’s crucial to apply your products lightly and avoid a heavy-handed approach. Build up the coverage gradually, starting with a small amount of product and adding more if necessary. This technique ensures that your makeup doesn’t look cakey or overly done, allowing your skin to shine through.
Blend well for a seamless finish
Blending is the key to achieving a seamless and natural-looking finish. Take your time to blend your foundation, concealer, eyeshadow, and any other products you apply. Use gentle circular motions or soft back-and-forth blending to ensure that there are no visible lines or harsh edges.
Choose shades that enhance your natural features
Selecting shades that enhance your natural features is essential for a natural makeup look. Opt for eyeshadow shades that complement your eye color and bring out their natural beauty. Similarly, choose blushes that match your skin tone and lipstick shades that enhance your lip color. By working with your natural features, you’re enhancing your appearance instead of masking it.
Less is more – focus on enhancing, not masking
The mantra of a natural makeup look is “less is more.” Instead of trying to completely mask your features, focus on enhancing and bringing out your natural beauty. Embrace your unique features and use makeup to accentuate them rather than hide them. The goal is to have your makeup enhance your confidence, not detract from your natural radiance.
Practice Makes Perfect
Experiment with different techniques and products
Don’t be afraid to experiment and try out different techniques and products to find what works best for you. Everyone’s skin and preferences are different, so what might work for someone else may not work for you. Take the time to explore different makeup techniques and try out new products to figure out what makes you feel most comfortable and confident.
Practice the routine in advance to save time
To ensure efficiency when you’re short on time, practice your two-minute makeup routine in advance. By practicing, you become more familiar with the steps and can streamline your process. It also helps you figure out which products and techniques work best for your skin type and desired natural look.
Adapt the routine based on your personal preferences
Remember that makeup should be an expression of your individuality and personal style. While this article provides a comprehensive guide, feel free to adapt the routine based on your personal preferences. If, for example, you prefer a stronger brow or a bolder lip, make adjustments that make you feel your best. The key is to feel confident in your natural look and make it your own.
By following these tips and embracing a two-minute makeup routine, you can achieve a natural look effortlessly. Remember to choose the right products for your skin type, prep your skin properly, create a flawless base, enhance your eyes and define your brows, add a touch of color, and finish with a few quick tips for efficiency. With practice and personalization, you’ll master the art of a natural makeup routine that enhances your beauty while highlighting your unique features.