Are you ready to take your eyeshadow game to the next level? If you’ve ever been frustrated by the struggle to blend different eyeshadow shades seamlessly, then this article is for you. We’ll guide you through some simple tips and techniques that will help you achieve that flawless, professional look every time. Whether you’re a beginner or a seasoned makeup enthusiast, mastering the art of blending will elevate your eyeshadow skills to new heights. So grab your brushes and get ready to create stunning eye looks that will turn heads. Let’s dive into the world of seamless eyeshadow blending!
Check here to see how this cup of morning coffee will bright your whole day!!
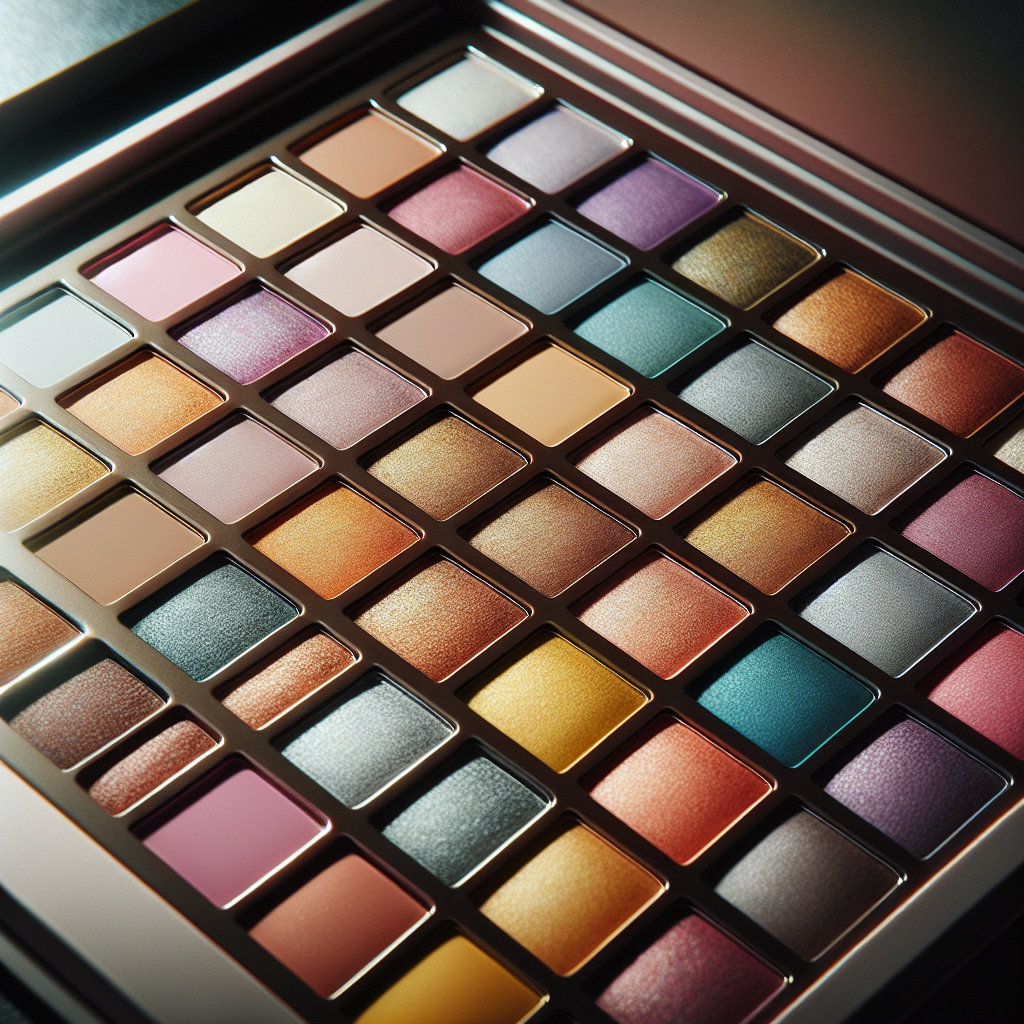
Choosing the Right Eyeshadow Shades
Finding the perfect eyeshadow shades to enhance your eye color and undertones is essential for creating a beautiful eye makeup look. When choosing eyeshadow shades, it’s important to determine your eye color and undertones first.
Determining your eye color and undertones
To determine your eye color, look closely at your eyes in natural lighting. Pay attention to the colors that are most prominent in your iris. This will help you choose eyeshadow shades that will complement and enhance your eye color.
In addition to eye color, identifying your undertones is crucial in selecting the right eyeshadow shades. Undertones can be warm, cool, or neutral. Warm undertones have a hint of yellow or peach, cool undertones have a blue or pinkish undertone, while neutral undertones have a balance of warm and cool tones.
Understanding the color wheel
Once you have determined your eye color and undertones, it’s helpful to understand the color wheel. The color wheel can guide you in choosing eyeshadow shades that will complement each other. Complementary colors are opposite each other on the color wheel and create a striking contrast, while analogous colors are next to each other and create a harmonious blend.
By understanding the color wheel, you can create eye-catching and cohesive eyeshadow looks by selecting shades that work well together.
Opting for shades that complement each other
When it comes to choosing eyeshadow shades, it’s important to select colors that complement each other and enhance your eye color. For example, if you have blue eyes, warm copper or bronze shades can make your eyes pop. If you have green eyes, shades of purple or burgundy can bring out the green in your eyes. Experimenting with different color combinations can help you find the perfect shades that suit your eye color and undertones.
Preparing Your Eyelids
Before applying eyeshadow, it’s essential to prepare your eyelids to ensure a smooth and long-lasting application.
Using an eyeshadow primer
Using an eyeshadow primer is a game-changer when it comes to making your eyeshadow stay in place and appear more vibrant. Apply a small amount of eyeshadow primer to your eyelids and blend it using your fingertips or a brush. This will create a smooth canvas for your eyeshadow and prevent creasing.
Applying a base eyeshadow shade
After applying an eyeshadow primer, start by applying a base eyeshadow shade. The base shade should be a neutral color that matches your skin tone. This will help to even out any discoloration on your eyelids and create a seamless transition between shades.
Apply the base shade using a flat eyeshadow brush, starting from the lash line and blending it upwards towards the crease. This will provide a solid base for the rest of your eyeshadow shades.
Blending Techniques
Proper blending is the key to achieving a seamless and professional-looking eyeshadow application. Here are some blending techniques that will help you achieve a flawless blend.
Utilizing a fluffy blending brush
A fluffy blending brush is essential for achieving a soft and diffused eyeshadow look. This type of brush has long, fluffy bristles that are perfect for blending out harsh lines and creating a seamless transition between shades.
Using a fluffy blending brush, blend the eyeshadow shades in small circular motions or windshield-wiper motions. This will ensure that the colors blend together smoothly and there are no harsh lines.
Using a windshield-wiper motion
The windshield-wiper motion is a technique used to blend eyeshadow shades seamlessly. To execute this technique, hold your blending brush horizontally and move it back and forth in a gentle sweeping motion. This technique is particularly effective for blending shades in the crease and outer corner of the eye.
Blending in a circular motion
Blending in a circular motion is another effective technique for achieving a seamless blend. To blend in a circular motion, gently swirl your brush in small circles over the eyeshadow shades. This technique helps to soften the colors and create a gradient effect.
Tapping or patting motions for intensity
If you want to intensify the color of a particular shade, you can use tapping or patting motions. Simply pat or tap the eyeshadow shade onto the desired area using a flat eyeshadow brush or your fingertip. This technique helps to build up the color gradually and create a more intense effect.
Gradual Color Build-Up
Achieving a seamless and well-blended eyeshadow look often requires building up the color gradually. Here’s how you can achieve a gradual color build-up.
Starting with lighter shades
Begin by applying lighter shades to your eyelids. Lighter shades serve as a base and help to create a seamless transition between colors. Apply the lighter shade all over the lid and blend it towards the crease using a fluffy blending brush.
Layering in darker shades gradually
After applying the lighter shades, gradually layer in darker shades to add depth and dimension to your eyeshadow look. Start by applying the darker shade to the outer corner or crease, and then blend it towards the center of the lid using a fluffy blending brush. This gradual layering technique ensures that the colors blend seamlessly together without any harsh lines.
Creating Depth and Dimension
Creating depth and dimension is an essential step in achieving a professional-looking eyeshadow application. Here are some techniques to help you create depth and dimension in your eyeshadow looks.
Applying a transition shade
A transition shade is a mid-tone shade that helps to create a seamless gradient between the lighter and darker eyeshadow shades. It acts as a buffer between the two shades and ensures that there are no harsh lines.
To apply a transition shade, use a fluffy blending brush and blend it in the crease area. Use soft windshield-wiper or circular motions to blend the shade into the crease, ensuring a smooth transition.
Defining the crease with a darker shade
To add definition and depth to your eyeshadow look, apply a darker shade to the crease. This will create a shadow effect and add dimension to your eyes.
Using a smaller blending brush or a pencil brush, apply the darker shade directly into the crease. Use a light hand and blend the shade upward and outward towards the outer corner, ensuring a seamless blend with the transition shade.
Adding a pop of color on the center of the lid
To add an extra touch of dimension and interest to your eyeshadow look, consider applying a pop of color on the center of the lid. This can be a shimmery or metallic shade that contrasts with the rest of the eyeshadow colors.
Using a flat eyeshadow brush or your fingertip, gently pat the pop of color onto the center of the lid. Blend the color slightly towards the outer corners to ensure a seamless blend with the surrounding shades.
Blending the Outer V Area
The outer V area refers to the outer corner of the eye where the upper and lower lash lines meet. Blending this area properly is crucial for achieving a soft and well-blended eyeshadow look.
Creating a V shape in the outer corner
To create a defined outer V area, use a small blending brush or a pencil brush. Start by applying a darker shade to the outer corner of the eye and blend it towards the crease, forming a V shape. This will help to add depth and dimension to the outer corner.
Using a fluffy blending brush, blend the color gently to soften any harsh lines and ensure a seamless blend with the rest of the eyeshadow.
Blending the shades seamlessly for a soft effect
To achieve a soft and seamless blend in the outer V area, use a fluffy blending brush. Blend the eyeshadow shades in small circular motions, ensuring that there are no harsh lines or uneven patches of color.
By blending the shades seamlessly, you can create a soft and diffused effect that adds depth and dimension to your eye makeup look.
Blending for Different Eye Shapes
Different eye shapes require different blending techniques to achieve the desired look. Here are some tips for blending eyeshadow for specific eye shapes.
Tips for almond-shaped eyes
Almond-shaped eyes are considered the ideal eye shape and are naturally well-balanced. To enhance almond-shaped eyes, focus on creating depth and dimension in the outer corners. Blending the eyeshadow shades in a V shape and softly blending the colors towards the center of the lid will enhance the natural shape of almond-shaped eyes.
Tips for hooded eyes
Hooded eyes have a fold of skin that partially covers the eyelid, making the lid appear smaller. When blending eyeshadow for hooded eyes, it’s important to create a lifted and more pronounced crease.
Blend the eyeshadow shades slightly above the natural crease, focusing on the area above the hooded lid. This will create the illusion of a larger lid space and make the eyes appear more open.
Tips for deep-set eyes
Deep-set eyes are set deeper into the eye socket, creating a more prominent brow bone. When blending eyeshadow for deep-set eyes, it’s essential to focus on creating depth and dimension on the mobile lid.
Apply the eyeshadow shades to the mobile lid, blending them upwards towards the crease. This will help to bring forward the eyes and make them appear more prominent.
Tips for monolid eyes
Monolid eyes have a flatter eyelid without a visible crease. When blending eyeshadow for monolid eyes, it’s important to create the illusion of a crease and add dimension to the eyes.
Apply the eyeshadow shades slightly above the lash line, gradually building up the color towards the brow bone. Blend the shades in a windshield-wiper motion or small circular motions to create a gradient effect. This will help to add depth and create the appearance of a crease.
Fixing Patchiness or Harsh Lines
Sometimes, despite your best efforts, you may encounter patchiness or harsh lines in your eyeshadow application. Here are some techniques to fix those issues.
Using a clean blending brush to soften edges
If you notice any harsh lines or uneven edges, use a clean blending brush to soften the edges. Blend the colors gently in small circular motions, ensuring a seamless transition between shades.
Applying a neutral matte shade to diffuse harsh lines
For particularly harsh lines, you can apply a neutral matte shade over the area to diffuse the harshness. Using a clean blending brush, apply the matte shade to the area and blend it into the surrounding shades.
This technique will help to soften the lines and create a more cohesive and seamless eyeshadow look.
Blending with a clean brush in small circular motions
If you encounter patchiness or uneven color distribution, use a clean blending brush to blend the colors together in small circular motions. This will help to distribute the color evenly and create a seamless blend.
By using this technique, you can fix any patchiness and achieve a smooth and well-blended eyeshadow look.

Seamless Transitions between Shadows
Creating seamless transitions between eyeshadow shades is crucial to achieve a cohesive and well-blended eyeshadow look. Here are some techniques to ensure seamless transitions.
Smoothing transitions with a clean brush
To create smooth transitions between eyeshadow shades, use a clean blending brush to blend the colors together. This will help to soften any harsh lines and create a seamless blend.
Using soft circular motions, gently blend the colors together, focusing on the areas where the shades meet. This technique will ensure a seamless transition and a gradient effect between the shades.
Using a transition shade in between two contrasting shades
To create a seamless transition between two contrasting shades, use a transition shade. A transition shade is a mid-tone shade that helps to blend two colors together and create a smooth transition.
Apply the transition shade to the area where the two shades meet, using a fluffy blending brush. Blend the transition shade into the surrounding shades to create a seamless blend and soften any harsh lines.
By utilizing these techniques, you can achieve seamless transitions between eyeshadow shades and create a cohesive and well-blended eyeshadow look.
Finishing Touches
To complete your eyeshadow look, add some finishing touches that will enhance your overall makeup.
Highlighting the brow bone and inner corner
To lift and brighten the eyes, apply a shimmer or matte highlight shade to the brow bone and inner corner of the eyes. This will create a subtle glow and make your eyes appear more awake and refreshed.
Using a small eyeshadow brush or your fingertip, gently apply the highlight shade to the brow bone and inner corner. Blend it slightly downwards towards the lid to create a seamless transition.
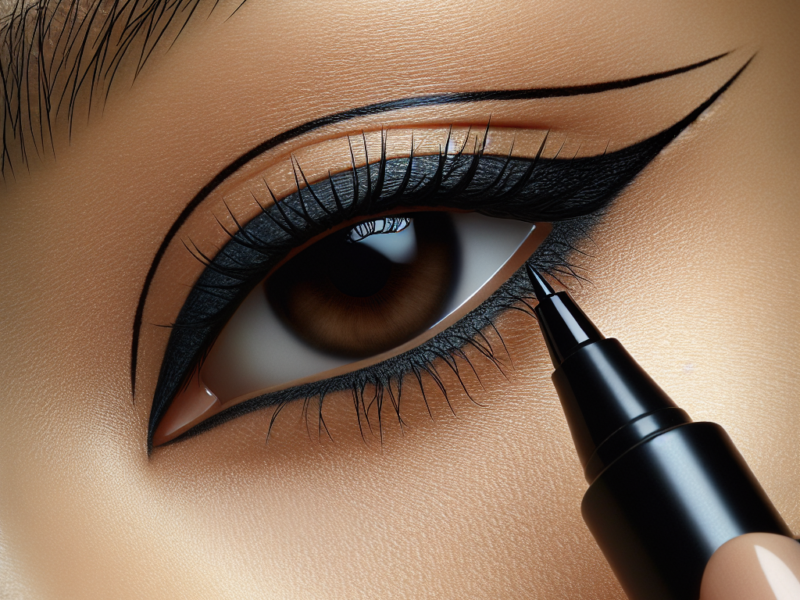
Smudging eyeliner for a soft look
For a softer and more natural look, consider smudging your eyeliner instead of creating a harsh line. Using a smudging brush or a cotton swab, gently smudge the eyeliner along the lash line to create a soft and smoky effect.
This technique will soften the overall look and create a more blended and seamless finish.
Applying mascara to enhance the lashes
To complete your eyeshadow look, apply mascara to enhance your lashes and make them appear longer and fuller. Choose a mascara that suits your preferences, whether it’s lengthening, volumizing, or both.
Starting at the base of the lashes, wiggle the mascara wand back and forth to coat each lash. Slowly move the wand upwards and comb through the lashes to separate and define them. Repeat this process on the lower lashes for a balanced look.
By applying mascara, you can enhance your overall eye makeup look and achieve a polished and finished result.
In conclusion, blending eyeshadow shades seamlessly is a skill that, once mastered, can help you achieve stunning eye makeup looks. By determining your eye color and undertones, understanding the color wheel, and opting for shades that complement each other, you can select the perfect eyeshadow shades for your eyes. Preparing your eyelids with an eyeshadow primer and a base shade is essential for a smooth and long-lasting eyeshadow application. Using blending techniques such as the fluffy blending brush, the windshield-wiper motion, and blending in a circular motion will ensure a seamless blend. Gradual color build-up, creating depth and dimension, blending the outer V area, and blending for different eye shapes are all important steps in achieving a well-blended eyeshadow look. Techniques such as using a clean blending brush, applying a neutral matte shade, and blending with a clean brush can fix patchiness or harsh lines. Creating seamless transitions between shadows can be done by smoothing transitions with a clean brush and using a transition shade. Finally, adding the finishing touches of highlighting the brow bone and inner corner, smudging eyeliner for a soft look, and applying mascara will enhance your overall eye makeup. With these tips and techniques, you can confidently blend eyeshadow shades seamlessly and create beautiful eye makeup looks.