You deserve to look flawless all day long, and that’s why we’re here to help you master the art of ‘no-crease’ concealer application. Say goodbye to those pesky creases and hello to a smooth and seamless finish that lasts. In this article, we’ll share expert tips and techniques to ensure that your concealer stays in place, giving you a flawless, natural-looking complexion that lasts all day. Get ready to become a pro at ‘no-crease’ concealer application and say hello to flawless skin like never before.
Check here to see how this cup of morning coffee will bright your whole day!!
Primer
Choose the right primer
When it comes to achieving a flawless makeup look with no creasing, choosing the right primer is essential. Look for a primer that matches your skin type and addresses any specific concerns you may have, such as pore minimizing or color correcting. This will create a smooth canvas for your concealer and help it adhere better to your skin.
Apply a thin layer of primer
Once you’ve chosen the right primer, apply a thin layer evenly across your face. Using too much primer can actually create a slippery surface that causes your concealer to slide and crease. By applying a thin layer, you’ll ensure that your concealer stays in place throughout the day without settling into fine lines or wrinkles.
Allow the primer to dry
After applying the primer, give it a few minutes to dry completely before moving on to the next steps. This will allow the primer to sink into your skin and create a smooth base for your concealer. Patience is key here, as rushing can lead to a less seamless application.
Choosing the Right Concealer
Identify your skin tone
To find the perfect concealer shade, start by identifying your skin tone. Are you fair, light, medium, tan, or deep? This will help you narrow down the range of shades that will suit your complexion. If you’re unsure, you can always visit a makeup counter or consult with a beauty professional who can help you determine your skin tone.
Determine your undertone
In addition to your skin tone, it’s important to determine your undertone. Undertones can be warm, cool, or neutral, and they play a crucial role in finding a concealer shade that will seamlessly blend with your skin. Look at the veins on your wrist to determine your undertone: blue or purple veins indicate a cool undertone, green veins indicate a warm undertone, and a mix of both suggests a neutral undertone.
Select a concealer shade
Once you have an idea of your skin tone and undertone, you can start selecting the right concealer shade. Ideally, you want a shade that is one to two shades lighter than your skin tone to provide brightening and highlighting effects. However, if you’re using the concealer for blemishes, you’ll want a shade that matches your skin tone exactly to ensure natural-looking coverage.
Consider the coverage level
Another factor to consider when choosing a concealer is the coverage level you desire. If you’re dealing with dark circles or stubborn blemishes, you may want a full-coverage concealer that can effectively camouflage them. On the other hand, if you’re just looking to lightly conceal minor imperfections, a medium or sheer coverage concealer will do the trick. Consider your needs and preferences when selecting the right coverage level.
Prepping the Skin
Cleanse and moisturize the face
Before applying any makeup, it’s important to cleanse and moisturize your face to create a smooth canvas for your concealer. Use a gentle cleanser to remove any dirt or excess oil, then follow up with a moisturizer that suits your skin type. This will ensure that your skin is well-prepped and hydrated, preventing your concealer from settling into dry patches or creasing throughout the day.
Apply an eye cream
The delicate skin under your eyes can benefit from some extra hydration. Before applying your under-eye concealer, gently pat on a small amount of eye cream. This will help moisturize the area and minimize the appearance of fine lines and wrinkles, allowing for a smoother application of concealer.
Use a lip balm
While we often focus on concealing the face, let’s not forget about the lips. Just like any other area of your skin, your lips can benefit from some moisturization. Before applying any lip products, be sure to use a lip balm to keep your lips soft and smooth. This will ensure that your lipstick or lip gloss applies evenly and lasts longer without creasing or drying out.
Applying Under-Eye Concealer
Dot the concealer in a triangle shape
When applying under-eye concealer, avoid swiping or rubbing the product as it can disturb the delicate skin and make creasing more likely. Instead, gently dot the concealer in a triangle shape starting from the inner corner of your eye, extending down to the outer corner, and then up towards the outer edge of your eyebrow. This technique helps to brighten the under-eye area and create a lifted effect.
Blend with a damp makeup sponge
To achieve a seamless and crease-free finish, blend your under-eye concealer with a damp makeup sponge. The dampness of the sponge helps to sheer out the product and blend it seamlessly into the skin. Start by gently pressing and patting the sponge over the concealer, using bouncing motions to blend it in. Be sure to blend not only the product but also the edges to ensure a natural transition between the concealer and the rest of your skin.
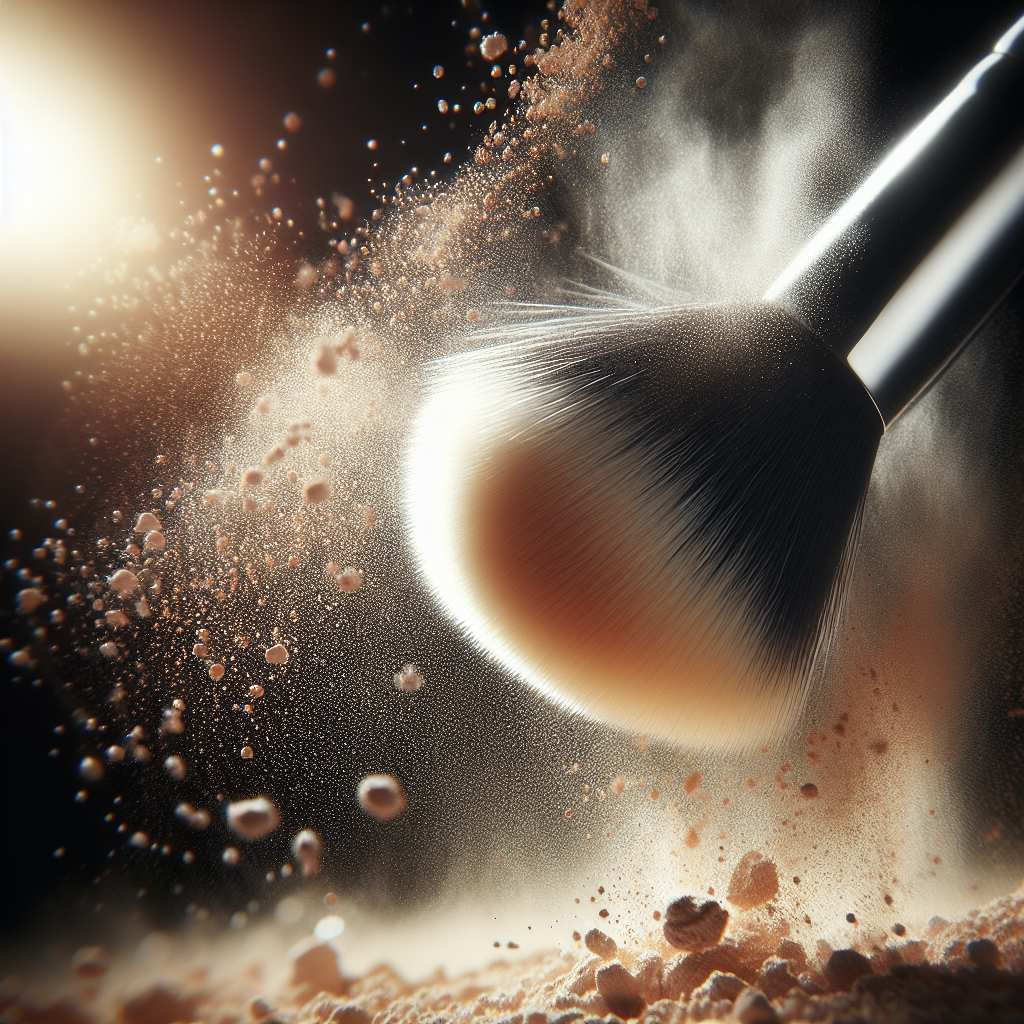
Set with a translucent powder
To lock your under-eye concealer in place and prevent creasing throughout the day, set it with a translucent powder. Using a small powder brush or a makeup sponge, lightly dust a thin layer of translucent powder over the concealed area. This will help to absorb excess moisture and oil, ensuring that your concealer stays in place without settling into fine lines or creasing.
Concealing Blemishes
Spot treat with concealer
When it comes to concealing blemishes, a targeted approach is key. Rather than applying concealer all over your face, focus on spot treating the areas where you need coverage. Gently dab a small amount of concealer directly onto the blemish using a clean finger or a small brush. This will ensure precise coverage without disturbing the surrounding skin.
Gently blend using a small brush
After applying concealer to the blemish, gently blend it into the surrounding skin using a small brush. This will help to seamlessly blend the concealer with the rest of your complexion, creating a natural finish. Be careful not to rub or tug on the blemish, as this can cause the concealer to move and crease.
Set with a setting powder
To ensure that your blemish concealer stays in place all day and doesn’t crease or smudge, set it with a setting powder. Using a small brush, lightly dust a small amount of setting powder over the concealed blemish. This will help to lock the concealer in place and prevent any unwanted movement or creasing.
Techniques for Crease-Free Application
Use thin layers of concealer
To prevent creasing, it’s important to apply concealer in thin layers rather than using a heavy-handed approach. Build up the coverage gradually by applying a thin layer of concealer, blending it, and then adding more if needed. This will allow the concealer to seamlessly meld with your skin without settling into fine lines or creasing.
Avoid excessive product buildup
While it can be tempting to pile on the concealer to achieve maximum coverage, doing so can actually lead to creasing. Excessive product buildup is more likely to settle into fine lines and wrinkles, emphasizing them rather than concealing them. Remember, less is more when it comes to concealer application, and it’s better to build up thin layers for a more seamless finish.
Blend thoroughly
Proper blending is crucial for a crease-free concealer application. Whether you’re concealing under-eye circles or blemishes, take the time to thoroughly blend the concealer into your skin. This can be done using a makeup sponge, brush, or even your fingertips. The key is to use gentle tapping or patting motions to ensure that the concealer seamlessly blends with your skin without leaving any streaks or uneven patches.
Set with powder for lasting results
To keep your concealer in place throughout the day and prevent any creasing, it’s important to set it with a powder. Use a fluffy brush to lightly dust a translucent or setting powder over the concealed areas. This will help to absorb excess moisture and oil, providing a matte finish that helps the concealer stay in place for longer without creasing.
Setting the Concealer
Choose the right setting powder
When it comes to setting your concealer, choosing the right setting powder is crucial. Opt for a translucent powder or a setting powder that matches your skin tone. Avoid powders with a heavy or cakey texture, as they can accentuate fine lines and creases rather than setting the concealer smoothly.
Apply a light dusting of powder
After applying your concealer, lightly dust a small amount of setting powder over the concealed areas. Use a fluffy brush to gently sweep the powder over the skin, ensuring that it is evenly distributed. Be mindful not to apply too much powder, as this can create a dry or caked-on appearance. A light dusting is all you need to set your concealer and achieve a crease-free finish.
Use a fluffy brush for precision
To ensure precise application of setting powder, use a fluffy brush to lightly dust it over the concealed areas. The fluffy bristles help disperse the powder evenly, preventing any heavy buildup that can lead to creasing. Gently tap off any excess powder before applying, as this will help you achieve a more natural and seamless finish.
Additional Tips
Set concealer with a setting spray
If you want to take your crease-free concealer game to the next level, consider setting your concealer with a setting spray. Once you’ve finished applying your concealer and setting powder, lightly mist your face with a setting spray to lock everything in place. This will help your concealer last even longer and prevent any creasing or fading throughout the day.
Avoid excessive powder application
While setting powder is essential for a crease-free concealer application, it’s important to avoid applying too much powder. Excessive powder can make your makeup appear heavy and cakey, increasing the likelihood of creasing. Remember to use a light hand and only apply a small amount of powder to set your concealer.
Consider using a color corrector
If you have specific skin concerns such as dark circles or redness, you may benefit from using a color corrector before applying concealer. Color correctors work by neutralizing and canceling out unwanted tones in the skin. For example, a peach or orange color corrector can help to counteract dark under-eye circles, allowing your concealer to blend more seamlessly and provide better coverage.

Long-Lasting Techniques
Opt for long-wearing concealers
If you tend to struggle with creasing, opt for long-wearing concealers that have a formula designed to stay in place for extended periods. These concealers are often more resistant to creasing, smudging, and fading, ensuring that your makeup stays fresh and flawless throughout the day. Look for long-wearing or waterproof options when shopping for concealers.
Set with a matte eyeshadow
For extra insurance against creasing, consider setting your concealer with a matte eyeshadow that matches your skin tone. Once you’ve applied your concealer and set it with powder, lightly dust a small amount of matte eyeshadow over the concealed areas using a fluffy brush. The eyeshadow will provide an additional layer of setting power, helping to lock your concealer in place and prevent any creasing.
Apply concealer before foundation
An alternative technique for crease-free concealer application is to apply your concealer before foundation. By doing this, you ensure that the concealer is fully blended into your skin before applying any additional products. This method prevents the concealer from moving or creasing when you layer foundation on top of it.
Preventing Creasing Throughout the Day
Avoid excessive rubbing or touching
One of the most common causes of creasing is excessive rubbing or touching of the face. Throughout the day, try to avoid touching your face unnecessarily, as this can disrupt the makeup and cause creasing. If you have an itch or need to adjust your makeup, use a clean brush or tissue to gently pat or dab the area instead of rubbing.
Blot excess oil or sweat
Excess oil or sweat can also contribute to creasing, particularly in areas like the under-eye region or T-zone. To prevent this, carry oil-absorbing sheets or blotting papers with you for touch-ups throughout the day. Gently blot any excess oil or sweat from the concealed areas, being careful not to disturb the makeup underneath. This will help to keep your concealer crease-free and fresh-looking.
Consider using a makeup primer
As mentioned earlier, using a primer is crucial for a crease-free concealer application. A good primer not only helps your concealer adhere better to your skin but also creates a smooth and even surface for application. If you find that your concealer creases easily, consider using a makeup primer specifically designed to address this concern. This will provide an extra layer of protection against creasing and help your concealer last longer throughout the day.
By following these tips and techniques, you can achieve a flawless and crease-free concealer application. Remember to choose the right products for your skin type, prepare your skin properly, and apply and set your concealer with care. With a little practice and patience, you’ll be able to enjoy a seamless and long-lasting concealer that enhances your natural beauty.