Want to add some dimension to your hair without breaking the bank or taking a trip to the salon? Look no further! In this article, we will show you the step-by-step process of adding highlights to your hair in the comfort of your own home. With just a few simple tools and a little bit of patience, you can achieve the sun-kissed look you’ve always dreamed of. So grab your hairbrush and get ready to transform your locks into a work of art!
Can Drinking Unicorn Juice Help You Shed Pounds? Read this!!
Choosing the Right Highlighting Technique
Adding highlights to your hair is a great way to enhance your natural color and add dimension to your hairstyle. There are several highlighting techniques to choose from, each with its own unique effect. Whether you prefer traditional foil highlights, balayage highlights, chunky highlights, or ombre highlights, it’s important to select the technique that best suits your desired look and hair type.
Traditional Foil Highlights: Traditional foil highlights involve separating small sections of hair and applying color to those sections before wrapping them in aluminum foil. This technique allows for precise placement of the highlights and creates a more uniform, blended effect.
Balayage Highlights: Balayage highlights are a more freehand technique that involves painting color onto the hair in a sweeping motion. This technique creates a more natural, sun-kissed look that grows out seamlessly with your hair.
Chunky Highlights: If you’re looking for a bolder, more edgy look, chunky highlights may be the perfect option for you. This technique involves coloring larger, more defined sections of hair, which results in a dramatic contrast between the highlighted and unhighlighted strands.
Ombre Highlights: Ombre highlights create a gradation of color from the roots to the ends of the hair. This technique can be achieved using a variety of colors, from light to dark, creating a trendy and stylish look. Ombre highlights are a great choice if you want to add depth and dimension to your hair while maintaining a natural appearance.
Gathering the Necessary Supplies
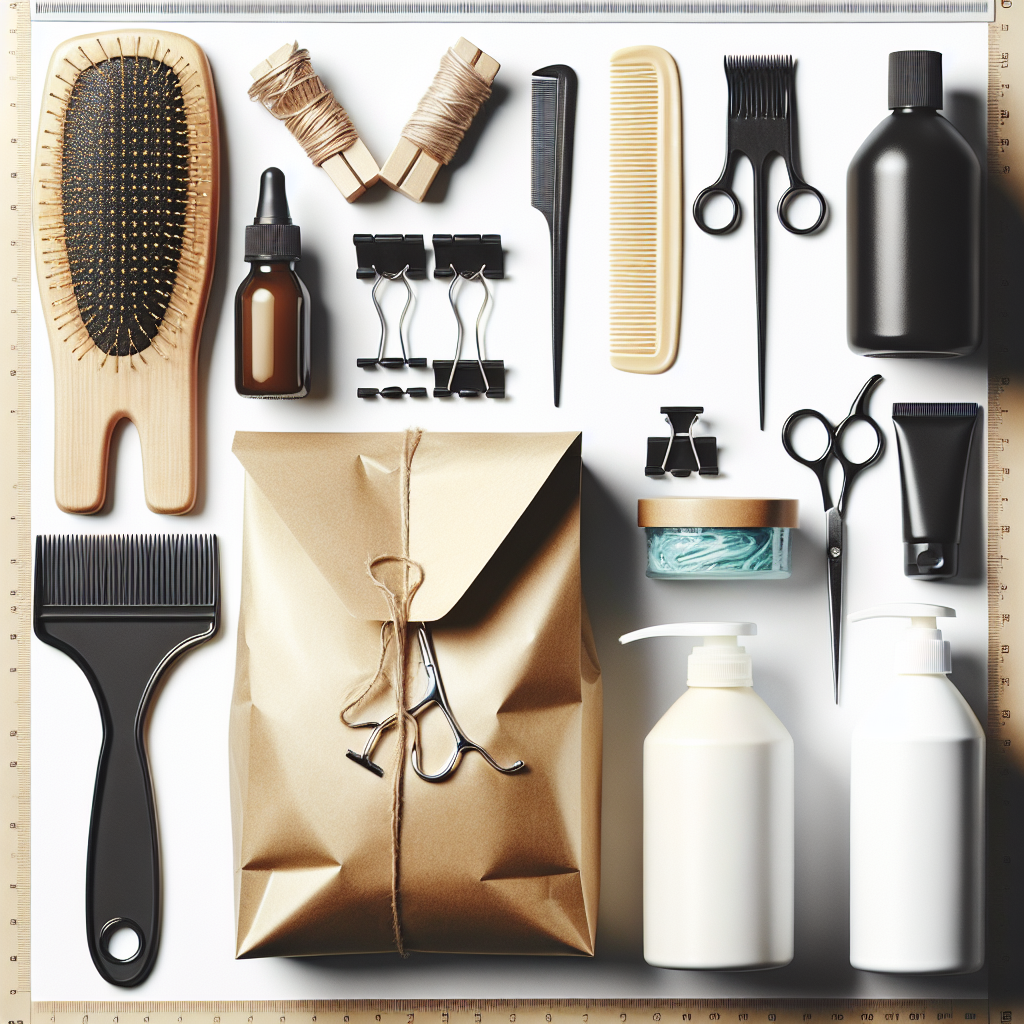
Before you start the highlighting process, it’s important to gather all the supplies you’ll need. Ensuring you have everything on hand will make the process smoother and more efficient. Here are the supplies you’ll need:
Highlighting Kit: Choose a highlighting kit that best suits your needs and desired look. These kits typically contain everything you’ll need, including the highlighting product, developer, and instructions.
Hairbrush or Comb: You’ll need a hairbrush or comb to help section and comb out your hair during the process.
Sectioning Clips: Sectioning clips are essential for separating your hair into manageable sections, which makes it easier to apply the highlights.
Gloves: It’s important to protect your hands from the highlighting product by wearing gloves throughout the process.
Old Towels: Use old towels to protect your clothing and surfaces from any potential spills or stains during the highlighting process.
Preparing Your Hair
Properly preparing your hair before applying the highlights is crucial for achieving the best results. Follow these steps to prepare your hair for the highlighting process:
Wash and Dry Your Hair: Start by washing and drying your hair thoroughly. Make sure to remove any excess oils or product buildup that may hinder the highlighting process.
Comb Out Any Tangles: Use a comb or brush to gently comb out any tangles or knots in your hair. This will ensure an even application of the highlights and prevent any clumping or uneven color distribution.
Apply a Protective Barrier: Before applying the highlights, it’s important to protect your skin and prevent staining. Apply a thin layer of petroleum jelly or a hairline protector around your hairline and ears.
Section Your Hair: Divide your hair into smaller sections using the sectioning clips. This will make it easier to apply the highlights evenly and ensure thorough coverage.
Applying the Highlights
Once your hair is properly prepared, it’s time to apply the highlights. Follow these steps to achieve the desired look:
Start with Small Sections: Begin by selecting small sections of hair to highlight. The size of the sections will depend on the technique you have chosen and the desired effect.
Apply the Highlighting Product: Using the applicator provided in the highlighting kit, apply the highlighting product to the selected sections of hair. Make sure to saturate the hair evenly from root to tip for consistent color.
Wrap in Foil or Plastic Wrap: If you’re using traditional foil highlights, wrap each highlighted section in aluminum foil to help the color develop and prevent bleeding. If you’re using a balayage technique, skip this step.
Repeat for Each Section: Continue selecting small sections of hair and applying the highlighting product until all desired areas are covered. Take your time and work systematically to ensure uniform color distribution.
Waiting for the Color to Develop
After applying the highlights, it’s important to allow enough time for the color to develop. Follow these guidelines to ensure optimal results:
Follow the Recommended Processing Time: Check the instructions included with your highlighting kit for the recommended processing time. This will vary depending on the brand and the desired level of lift or color intensity.
Check the Highlights Frequently: Keep a close eye on the developing color by periodically checking the sections you’ve highlighted. This will prevent overprocessing and help you achieve the desired shade.
Avoid Overprocessing: It’s crucial to remove the highlights at the right time to avoid overprocessing. Overprocessing can lead to damage and a less desirable color result. Remember, it’s always better to underprocess than overprocess.
Rinsing and Conditioning
Once the desired color has developed, it’s time to rinse out the highlights and condition your hair. Follow these steps to complete the process:
Rinse the Highlights Thoroughly: Begin by thoroughly rinsing out the highlights with lukewarm water. Make sure to remove all traces of the highlighting product from your hair.
Apply a Color-Safe Conditioner: After rinsing, apply a color-safe conditioner to your hair, focusing on the highlighted areas. This will help moisturize and nourish your hair, restoring any moisture lost during the highlighting process.
Gently Pat Dry: Gently pat your hair dry with a towel, avoiding any harsh rubbing. This will prevent excessive damage to the hair shaft and help maintain the integrity of the color.
Styling and Finishing Touches
Now that your hair is highlighted and conditioned, it’s time to style and add those finishing touches. Follow these steps for a polished look:
Blow Dry Your Hair: Use a blow dryer to dry your hair as desired. Pay attention to the roots and ensure that all sections are thoroughly dried.
Style as Desired: Once your hair is dry, style it as desired, whether you prefer cascading curls, sleek straight locks, or a trendy updo. The highlights will add depth and dimension to your chosen hairstyle.
Use Hair Serum or Oil for Shine: To add extra shine and luster to your highlighted hair, apply a small amount of hair serum or oil. This will help tame any frizz and give your hair a healthy, glossy finish.
Touch Up Any Areas: If you notice any areas that need a touch-up or additional color, you can carefully apply the highlighting product to those sections. Remember to follow the same steps as before and apply the product evenly.
Caring for Highlighted Hair
Once you’ve added highlights to your hair, it’s important to take care of them to maintain their vibrancy and health. Follow these tips to keep your highlighted hair looking its best:
Use Color-Safe Shampoo and Conditioner: Invest in a color-safe shampoo and conditioner specifically formulated for highlighted or colored hair. These products will help preserve the color and prevent fading.
Avoid Excessive Heat Styling: Excessive heat styling can cause damage to your hair, especially if it’s already been highlighted. Limit the use of hot tools like curling irons and straighteners, and always use a heat protectant spray before styling.
Protect Your Hair from the Sun: The sun’s rays can fade and damage your highlighted hair, so it’s crucial to protect it. Wear a hat or use a leave-in conditioner or UV protectant spray before spending time in the sun.
Regularly Deep Condition: Keep your highlighted hair nourished and moisturized by incorporating regular deep conditioning treatments into your hair care routine. These treatments will help restore moisture and prevent dryness and damage.

Common Mistakes to Avoid
While adding highlights at home can be a fun and rewarding experience, there are some common mistakes to avoid. By being aware of these pitfalls, you can achieve salon-worthy results:
Going Too Light or Too Dark: It’s important to select a highlighting shade that complements your natural hair color. Avoid choosing a shade that is drastically lighter or darker, as it may result in an unnatural appearance.
Not Sectioning Hair Properly: Proper sectioning ensures that the highlights are applied evenly and uniformly throughout your hair. Take the time to section your hair carefully and follow the guidelines provided in the highlighting kit.
Leaving Highlights in for Too Long: Leaving the highlights in for too long can lead to overprocessing and damage. Always follow the recommended processing time provided by the highlighting kit and monitor the color as it develops.
Skipping the Strand Test: Before applying the highlights to your entire head of hair, it’s important to do a strand test. This test will give you a preview of how the color will turn out and help you make any necessary adjustments to the technique or shade.
When to Seek Professional Help
While adding highlights to your hair at home can be a fun and cost-effective option, there are certain situations where it’s best to seek professional help. Consider these scenarios before deciding to DIY:
If You Want Dramatic Changes: If you’re looking for a dramatic change in hair color or want a complex highlighting technique, it’s best to consult a professional colorist. They have the expertise and knowledge to achieve the desired results.
If You Have Previous Color Treatments: If your hair has been previously colored or treated with chemicals, it may require special attention and expertise to add highlights. A professional colorist can assess the condition of your hair and determine the best course of action.
If You’re Unsure about the Process: If you’re unsure about the highlighting process, it’s always better to err on the side of caution and seek professional help. They can guide you through the process and ensure you achieve the desired look without any mishaps.
If You Want a Professional Finish: If you want a salon-quality finish and results that will last, it’s worth investing in a professional highlighting service. They have access to high-quality products and techniques that may not be readily available for home use.
In conclusion, adding highlights to your hair can be a fun and exciting way to enhance your natural beauty. By selecting the right highlighting technique, gathering the necessary supplies, properly preparing your hair, and following the application and aftercare steps, you can achieve stunning results. However, it’s important to know your limits and seek professional help when needed. With the right knowledge and techniques, you’ll be able to create beautiful, sun-kissed highlights that will make you feel confident and fabulous.