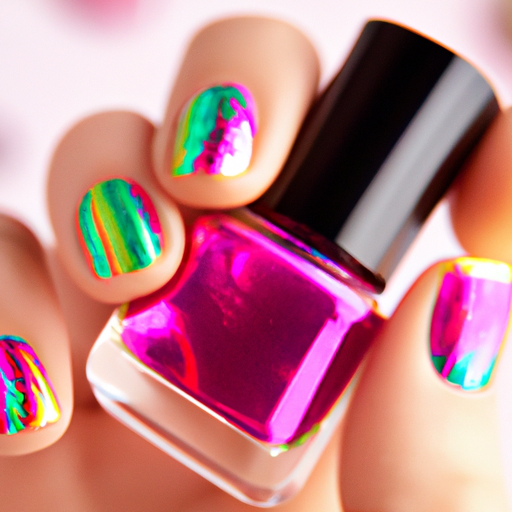
You love staying up-to-date with the latest nail trends, and nothing catches your attention quite like the eye-catching neon nail art that has been all the rage lately. From bright pinks to electrifying yellows, these vibrant hues are sure to make a bold statement. But how can you achieve this trendy look yourself? In this article, we will explore some tips and tricks to help you achieve the perfect vibrant neon nail art that will leave your friends in awe. So get ready to let your nails shine with these neon nail art techniques!
Hiring: Chat Job with FB Messenger $25/hour. See Requirements Now
Choosing the Right Nail Polish
When it comes to achieving trendy and vibrant neon nail art, choosing the right nail polish is crucial. One of the first factors to consider is your skin tone. Different colors complement different skin tones, so it’s important to find shades that will enhance your complexion. If you have fair skin, cool-toned neons like bright pinks and blues can be flattering. For medium skin tones, warmer shades like oranges and corals can add a pop of color. Deep skin tones can rock bold colors like neon greens and yellows. Experimenting with different shades and finding what looks best on you is the key to achieving stunning neon nail art.
Experiment with Different Colors
While neon shades are known for their bold and vibrant nature, don’t be afraid to experiment with a variety of colors. Neon nail art allows you to showcase your creativity and personality, so feel free to mix and match different shades. Consider creating gradient effects by using multiple neon colors on each nail. Try ombre designs, where colors blend seamlessly from one hue to another. For those who enjoy more intricate designs, nail stencils can be used to create unique patterns and shapes. The options are endless, so let your imagination run wild!
Opt for High-Quality Nail Polish
To ensure that your neon nail art looks its best and lasts longer, it is essential to opt for high-quality nail polishes. Look for brands that offer a wide range of neon colors and are known for their longevity and pigmentation. High-quality polishes not only provide better coverage but also dry faster, reducing the chances of smudging your artwork. They also tend to be more chip-resistant, helping your beautiful neon nails stay vibrant for a longer period. Investing in good-quality polishes will enhance your nail art experience and give you stunning results.
Preparing Your Nails
Before diving into creating neon nail art, it’s essential to spend some time preparing your nails. This will ensure that your nail polish applies smoothly and lasts longer.
Start with Clean and Dry Nails
Begin by thoroughly cleaning your nails to remove any oils or dirt that might affect the adherence of the nail polish. Using a gentle nail polish remover, wipe away any existing polish on your nails. Make sure to rinse your hands thoroughly and dry them completely before proceeding.
Shape and Trim Your Nails
Next, shape and trim your nails to your desired length and shape. Choosing a nail shape that suits your lifestyle and personal preference is important. Popular shapes include square, almond, and coffin. Trim your nails evenly and avoid cutting them too short, as this can weaken the nail bed.
Buff and Smooth the Nail Surface
To ensure a smooth and even application of your neon nail polish, gently buff the surface of your nails with a nail buffer. This will help to remove any ridges or unevenness, creating a flawless canvas for your nail art. Be careful not to buff too aggressively, as this can thin out the nail bed.
Applying a Base Coat
Prior to applying your neon nail polish, it’s essential to apply a base coat. This not only protects your nails from staining but also helps the nail polish to adhere better, resulting in a longer-lasting manicure.
Choose a Clear Base Coat
Choose a clear base coat that is specifically designed to be used as a base for nail polish. Avoid using colored base coats, as they may alter the true color of your neon polish.
Apply a Thin and Even Layer
Using the brush applicator, apply a thin and even layer of the base coat to each nail. Start from the base of the nail and stroke towards the tip, ensuring full coverage. Make sure to cover the entire nail surface but avoid applying too much product, as this can lead to longer drying times.
Allow the Base Coat to Dry Completely
Once you’ve applied the base coat to all your nails, allow it to dry completely. The drying time may vary depending on the brand of the base coat, so it’s essential to follow the instructions provided. Avoid touching or applying pressure on your nails during the drying process to prevent smudging.
Creating Neon Nail Art
Now that your nails are prepped and the base coat is dry, it’s time to unleash your creativity and create stunning neon nail art.
Using Nail Stencils
Nail stencils are a great way to create intricate and professional-looking designs on your nails. These adhesive templates come in various shapes and patterns, allowing you to achieve precise and detailed nail art. Simply apply the stencil to your dry base-coated nail and paint over it with your chosen neon shade. Once dry, carefully peel off the stencil to reveal your gorgeous neon nail art.
Trying the Gradient Technique
The gradient technique is a popular way to create a smooth transition of colors on your nails. To achieve this effect, pick two or more neon shades that complement each other. Start by applying a base color to your nails and allow it to dry. Then, using a makeup sponge, dab the second color onto the sponge and gently press it onto your nail. Repeat this process with the remaining colors, ensuring a seamless blend. Finish with a top coat to create a glossy and professional finish.
Experimenting with Nail Stickers
For those who are new to nail art or are looking for a quick and easy way to achieve stunning neon nails, nail stickers are a fantastic option. These adhesive decals are available in various designs and patterns, making it effortless to achieve intricate nail art. Simply apply the sticker to your dry, base-coated nail and press it down gently. Finish with a top coat to seal in the design and add durability.
Using Neon Nail Polish
Now that you’ve created your neon nail art, it’s time to apply the neon polish to complete the look.
Apply the Neon Polish in Thin Layers
To achieve the best results and prevent streaking, it’s essential to apply the neon polish in thin layers. Start with a small amount of polish on the brush and brush from the base of the nail to the tip. Gradually build up the color with additional thin layers, allowing each layer to dry before applying the next one. This will help to create an even and opaque finish.
Allow Each Layer to Dry
One common mistake when applying nail polish is not allowing each layer to dry completely before applying the next one. This can lead to smudging and unevenness in the overall appearance. Neon polishes may require slightly longer drying times, so be patient and give each layer ample time to dry before moving on to the next.
Add a Top Coat for Longevity
To seal in your neon nail art and add extra durability, it’s crucial to apply a top coat. A good-quality, clear top coat will help prevent chipping and extend the life of your manicure. Apply a thin layer of top coat over your fully dried neon polish and allow it to dry completely. This will give your nails a glossy and professional finish and ensure that your neon nail art lasts longer.
Adding Extra Design Elements
If you want to take your neon nail art to the next level, consider adding additional design elements.
Using Nail Art Brushes and Tools
Nail art brushes and tools can help you create intricate designs and patterns on your neon nails. With brushes of different sizes and shapes, you can experiment with lines, dots, and other shapes to create unique and personalized nail art. These tools allow for precise control, making it easier to achieve intricate details.
Incorporating Rhinestones and Glitters
Rhinestones and glitters can add sparkle and dimension to your neon nail art. Apply a clear top coat to the area where you want to add the rhinestones or glitter, and then carefully place them using a toothpick or tweezers. Make sure to press them gently onto the nail to ensure they stay in place. Finish with another layer of top coat to seal in the design and add shine.
Creating Nail Art Accents
Nail art accents involve adding unique elements to only a few nails rather than the entire manicure. This can include adding a different color or design to your ring finger or creating a statement nail. This technique allows you to experiment with different styles and patterns without committing to a full set of neon nails.
Ensuring Long-Lasting Neon Nails
To ensure that your neon nails stay vibrant and last longer, it’s important to take proper care of them.
Avoid Excessive Hand Washing
While it’s important to maintain good hand hygiene, excessive hand washing can weaken the nail polish and cause it to chip prematurely. Try to avoid prolonged exposure to water and protect your nails by wearing gloves when doing chores that involve water.
Protect Your Nails from Harsh Chemicals
Harsh chemicals, such as cleaning products and acetone, can strip away the protective layers of your nails and cause them to weaken. Whenever possible, wear gloves when using these chemicals and avoid exposing your nails to them for an extended period.
Moisturize Your Nails and Cuticles
Moisturizing your nails and cuticles is essential for maintaining their health and strength. Regularly apply cuticle oil or a moisturizing nail and cuticle cream to keep them hydrated and prevent dryness and brittleness. This will help to prevent the polish from chipping and your nails from breaking.
Removing Neon Nail Polish
When it’s time to remove your neon nail polish and switch up your nail art, make sure to do it properly to avoid damaging your nails.
Use an Acetone-based Polish Remover
To effectively remove neon nail polish, it’s best to use an acetone-based polish remover. Acetone helps break down the polish, making it easier to remove. Look for a polish remover that is specifically formulated for neon polishes to ensure the best results.
Soak a Cotton Pad in Remover
Soak a cotton pad with the acetone-based polish remover and place it directly onto your nail. Gently press down and hold it in place for a few seconds to allow the remover to penetrate the polish. Then, using a firm but gentle circular motion, rub the cotton pad over the nail to remove the polish. Repeat this process for each nail.
Gently Remove the Polish
Be gentle when removing the polish to avoid damaging the nail bed. If any stubborn polish remains, avoid scraping or picking at it. Instead, soak a fresh cotton pad in the remover and hold it on the nail for a few extra seconds before gently rubbing again. Once all the polish is removed, rinse your hands thoroughly and apply a moisturizing lotion or cuticle oil to nourish your nails and cuticles.

Maintaining Healthy Nails
To ensure that your nails stay healthy and strong, it’s important to follow good nail care practices.
Follow a Balanced Diet
Just like your skin and hair, your nails can benefit from a balanced diet. Incorporate foods rich in vitamins and minerals, such as biotin, zinc, and iron, into your diet. Foods like eggs, nuts, leafy greens, and lean meats can help promote healthy nail growth and strength.
Take Care while Applying and Removing Polish
Be mindful of how you handle your nails when applying and removing polish. Avoid using your nails as tools to open packages or scrape off stickers, as this can lead to breakage and weakening of the nails. Instead, use proper tools and techniques to avoid unnecessary damage.
Keep Your Nails Hydrated
Ensuring that your nails and cuticles are adequately hydrated is crucial for maintaining their health. Apply cuticle oil or a moisturizing nail and cuticle cream regularly to keep them hydrated and prevent dryness and brittleness. Additionally, avoid excessive exposure to water, as prolonged moisture can weaken the nails.
Experimenting with Nail Shapes
Apart from vibrant neon colors and stunning nail art, you can also experiment with different nail shapes to enhance your overall look.
Opt for Popular Nail Shapes
Popular nail shapes, such as square, almond, and coffin, can help you achieve different aesthetics. Square nails provide a classic and timeless look, while almond-shaped nails offer a more feminine and elegant appearance. Coffin nails, on the other hand, create a bold and edgy statement. Consider your personal style and outfit choices to determine which nail shape suits you best.
Try Different Lengths
Nail length is another factor to consider when experimenting with different nail shapes. Shorter nails are generally easier to maintain and can provide a more practical option for those with an active lifestyle. Longer nails, on the other hand, allow for more creativity and provide a canvas for intricate nail art. Experiment with different lengths to find the perfect balance between style and functionality.
Consider Your Lifestyle
When choosing a nail shape, it’s essential to consider your lifestyle and daily activities. If you have a job that involves a lot of typing or manual labor, shorter and more rounded nails may be a better option to prevent discomfort or breakage. On the other hand, if you have a more flexible and hands-on lifestyle, longer and more elaborate nail shapes may suit you better.
In conclusion, achieving trendy and vibrant neon nail art is all about choosing the right nail polish, experimenting with different colors and designs, and taking proper care of your nails. By considering your skin tone, using high-quality polishes, and preparing your nails properly, you can achieve a flawless base for your neon nail art. From there, let your creativity shine by trying different techniques such as nail stencils, gradient effects, and nail stickers. Adding extra design elements like using nail art brushes, incorporating rhinestones and glitters, and creating nail art accents can take your neon nails to the next level. Ensure the longevity of your neon nails by following tips for long-lasting wear, properly removing the polish, and maintaining healthy nails. Finally, don’t be afraid to experiment with different nail shapes to find the perfect fit for your personal style and lifestyle. With these tips and tricks, you’ll be well on your way to achieving trendy and vibrant neon nail art. So go ahead and express yourself with stunning neon nails!


