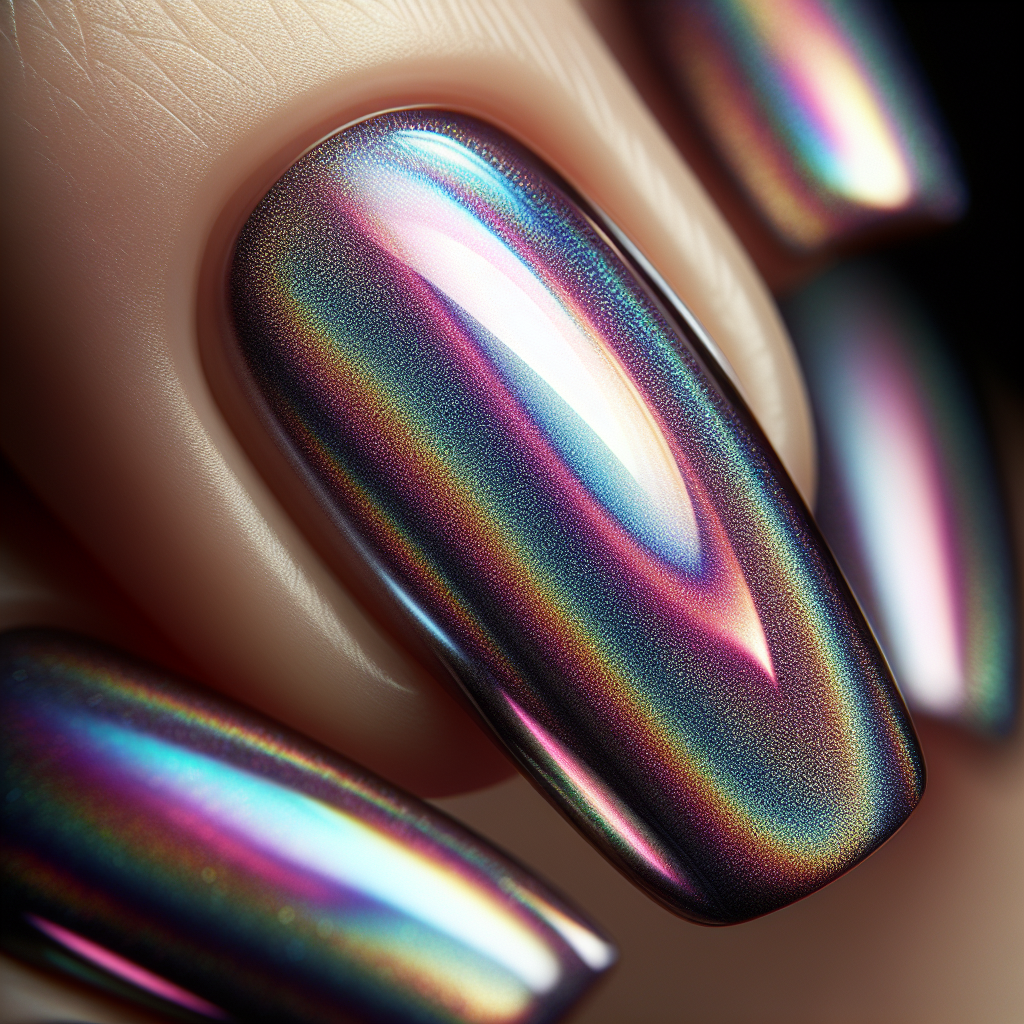
If you’ve ever wondered how to achieve the mesmerizing holographic and iridescent effects on your nails, look no further. In this article, we’ll guide you through the steps to create stunning nail designs that will make heads turn. From choosing the right products to mastering the application technique, you’ll soon be able to achieve nails that sparkle and shimmer with a magical allure. Get ready to elevate your nail game and dazzle everyone with your stunning holographic and iridescent nail effects.
Hiring: Chat Job with FB Messenger $25/hour. See Requirements Now
Choosing the Right Base Color
Consider Skin Tone and Undertones
When it comes to achieving holographic and iridescent nail effects, choosing the right base color is essential. One of the factors to consider is your skin tone. Different base colors can complement different skin tones, allowing the holographic or iridescent effect to truly shine.
For fair skin tones, light pastel shades such as baby pink or mint green can create a beautiful contrast with the holographic or iridescent pigments. Medium skin tones can experiment with a wider range of colors, from soft neutrals to vibrant hues. Darker skin tones can opt for deeper shades like navy blue or burgundy to enhance the holographic or iridescent effect.
Additionally, considering your undertones can also help in selecting the perfect base color. Cool undertones, characterized by a pink or bluish hue, can be complemented by icy tones like silver or lilac. Warm undertones, which have a yellow or golden undertone, can be enhanced with warm hues like rose gold or copper.
Complementing the Desired Holographic or Iridescent Effect
Apart from your skin tone and undertones, it’s important to choose a base color that complements the holographic or iridescent effect you want to achieve. For a more ethereal and dreamy look, pastel shades like lavender or pale blue can enhance the holographic or iridescent reflectivity. If you prefer a bold and vibrant effect, opting for a black or dark gray base color can create a dramatic contrast with the holographic or iridescent pigments.
Experimenting with different base colors allows you to customize your manicure and create a unique holographic or iridescent nail effect that reflects your personal style.
Prepping Your Nails
Remove Old Nail Polish
Before diving into the world of holographic and iridescent nail effects, it’s important to start with a clean slate. Begin by removing any existing nail polish from your nails. Use a gentle nail polish remover and cotton pads or acetone-free nail polish remover wipes to avoid drying out the nails.
Shape and Buff Your Nails
Once your nails are polish-free, take a moment to shape and buff them. Use a nail file to shape your nails to your desired length and shape, whether it’s rounded, square, or almond-shaped. Next, gently buff the surface of your nails using a nail buffer or a soft buffing block. This will help create a smooth canvas for the holographic or iridescent nail polish to adhere to.
Apply a Base Coat
Before applying the holographic or iridescent polish, it’s essential to apply a base coat. The base coat acts as a barrier between your natural nails and the nail polish, preventing staining and promoting longer wear. Choose a base coat that is specifically formulated for holographic or iridescent nail effects, as it can enhance the overall appearance and longevity of the manicure.
Using Holographic Nail Polish
Understanding Holographic Nail Polish
Holographic nail polish contains pigments that reflect light and create a multidimensional effect on the nails. The pigments in holographic nail polish create a prism-like effect, with varying colors appearing depending on the angle of light. This creates a mesmerizing finish that mimics the look of a hologram.
Applying Holographic Nail Polish
To achieve the holographic effect, begin by applying a thin coat of holographic nail polish to each nail. Start from the base of the nail and brush upwards towards the tip, ensuring even coverage. Allow the first coat to dry completely before applying a second coat for a more intense holographic effect.
Layering Techniques
To further enhance the holographic effect, you can experiment with layering techniques. Apply a thin layer of holographic nail polish, allow it to dry, and then apply a contrasting holographic shade on top. This layering technique creates depth and dimension, allowing the holographic effect to truly stand out.
Sealing the Holographic Effect
To seal and protect the holographic effect, finish off with a high-quality top coat specifically formulated for holographic nail polish. The top coat will not only add shine but also prolong the wear of the holographic effect, preventing chipping and fading.
Applying Iridescent Nail Polish
Exploring Iridescent Nail Polish
Iridescent nail polish differs from holographic nail polish in that it creates a shimmering, opalescent effect on the nails. The pigments in iridescent nail polish reflect a range of colors, creating a captivating and multidimensional look.
Applying Iridescent Nail Polish
To achieve the iridescent effect, apply a thin coat of iridescent nail polish to each nail. Similar to holographic polish, start from the base of the nail and brush upwards towards the tip, ensuring even coverage. Allow the first coat to dry completely before applying a second coat for a more intense iridescent effect.
Layering for a Multidimensional Effect
For a truly mesmerizing look, consider layering different shades of iridescent nail polish. Start with a base coat of a neutral or light shade and apply a thin layer of iridescent polish on top. Finish off with another coat of a complementary iridescent shade to create depth and dimension on the nails.
Finishing Touches
To complete the iridescent nail look, apply a high-quality top coat specifically designed for iridescent nail polish. This top coat will not only add shine but also protect the iridescent effect and prolong the wear of your manicure.
Experimenting with Nail Stamping
Understanding Nail Stamping
Nail stamping is a popular technique that allows you to transfer intricate designs onto your nails using a stamping plate, stamping polish, and a silicone or rubber stamper. This technique is perfect for creating detailed nail art without the need for freehand painting skills.
Preparing the Nail Stamping Kit
To get started with nail stamping, you’ll need a nail stamping kit, which typically includes a stamping plate, stamping polish, a scraper, and a stamper. Make sure to clean the stamping plate with acetone or nail polish remover before using it to remove any residue that may interfere with the design transfer.
Selecting the Right Image Plate
Choose a stamping plate that features holographic or iridescent designs to achieve the desired effect. Look for plates with intricate geometric patterns, floral motifs, or abstract designs that lend themselves well to holographic or iridescent nail art.
Stamping the Design
Begin by applying a thin layer of holographic or iridescent nail polish onto the desired design on the stamping plate. Use the scraper to remove any excess polish, leaving only the polish in the engraved design. Quickly transfer the design onto the stamper by gently pressing the stamper onto the design, then roll the stamper onto the nail, ensuring even pressure. Repeat this process for each nail, taking care to clean the stamper and plate between each transfer. Finish off with a top coat to seal the design and add shine.
Nail Decals and Transfers
Exploring Nail Decals and Transfers
Nail decals and transfers are a great way to achieve intricate and detailed holographic or iridescent nail designs with ease. They come in various shapes, sizes, and styles, allowing you to create unique and eye-catching manicures.
Preparing Your Nails and Decals
Before applying nail decals or transfers, ensure that your nails are clean and dry. Cut the decals or transfers to the desired size or shape, making sure they fit your nails perfectly. For holographic or iridescent effects, choose decals or transfers that feature these special finishes.
Applying and Securing the Decals
To apply the decals or transfers, start by peeling off the protective film or backing. Place the decal or transfer onto the nail, pressing it gently to remove any air bubbles or wrinkles. Use a cuticle pusher or the edge of an orangewood stick to smooth out the decal or transfer and secure it onto the nail.
Sealing the Design
To seal and protect the nail decals or transfers, apply a top coat over the entire nail. This will not only add shine but also ensure the longevity of the design. Make sure to allow the top coat to dry completely before engaging in any activities that may potentially smudge or damage the design.
Trying Nail Wraps
Understanding Nail Wraps
Nail wraps are adhesive nail coverings that come in various designs, patterns, and finishes, including holographic and iridescent options. They are an excellent alternative to traditional nail polish, offering easy application and long-lasting wear.
Preparing Your Nails for Nail Wraps
Before applying nail wraps, it’s crucial to shape and buff your nails as mentioned earlier. Ensure that your nails are free from any oils or residues that may interfere with the adhesive’s effectiveness. For holographic or iridescent nail wraps, choose a base color that complements the desired effect.
Applying the Nail Wraps
Start by selecting the nail wrap that matches the size of your nail. Peel off the nail wrap from the backing and place it onto the nail, starting from the cuticle and pressing it gently towards the tip. Smooth out any air bubbles or wrinkles and use a file or cuticle pusher to remove any excess wrap from the edges of the nail.
Trimming and Sealing
Once the nail wraps are applied, use nail clippers or nail scissors to trim any excess wrap. Be careful not to cut too close to the nail bed. To seal the nail wraps and prevent any peeling or lifting, apply a clear top coat over the entire nail. Allow the top coat to dry completely before engaging in any activities that may potentially damage the wraps.
Creating DIY Holographic and Iridescent Effects
Making a Holo Top Coat
If you want to enhance any nail polish shade with a holographic effect, you can create your own holo top coat. Mix a holographic pigment or holographic nail powder with a clear top coat, adjusting the ratio based on the intensity of the holographic effect you desire. Apply the DIY holo top coat over any base color to instantly transform it into a holographic dream.
Creating Holographic Powder Nails
To achieve holographic powder nails, you’ll need holographic nail powder and a no-wipe gel top coat. Apply a base coat and cure it under a UV or LED lamp. Next, apply the no-wipe gel top coat and cure it as well. Using a sponge applicator or an eyeshadow brush, gently brush the holographic nail powder onto the tacky gel top coat. Rub the powder onto the nails to ensure full coverage and then dust off any excess powder. Finally, apply another layer of the no-wipe gel top coat to seal the holographic powder and cure it once again.
Crafting Your Own Iridescent Polish
If you want to experiment with iridescent nail polish, you can create your own using a clear polish and iridescent nail powder or mica flakes. Mix the iridescent powder or flakes with the clear polish, adjusting the ratio to achieve the desired opacity and reflectivity. Apply the DIY iridescent polish over a base color or on its own for a captivating and multidimensional effect.
Experimenting with Iridescent Glitter
Iridescent glitter can add a stunning touch to any nail design. Whether you want to create an ombre effect or accentuate specific areas of your nails, iridescent glitter can elevate your holographic or iridescent nail effects. Apply a layer of clear polish or top coat onto your nails and sprinkle the iridescent glitter over the desired areas. Gently press the glitter into the polish or top coat for better adherence. Finish off with another layer of clear polish or top coat to seal the glitter and add shine.
Maintaining and Removing Holographic and Iridescent Nail Effects
Caring for Holographic and Iridescent Nails
To maintain the beauty and longevity of your holographic and iridescent nails, it’s important to take proper care of them. Avoid exposing your nails to harsh chemicals and abrasive surfaces that may cause scratches or damage. Protect your nails by wearing gloves when doing chores or any activities that may put your nails at risk. Apply a top coat every few days to refresh the shine and seal the holographic or iridescent effect.
Avoiding Scratches and Damage
Although holographic and iridescent nail effects are stunning, they can be prone to scratches and damage. To minimize the risk of scratches, refrain from using your nails as tools and gently handle objects. Avoid any activities that may involve excessive contact with water, such as swimming or washing dishes without gloves. Additionally, use caution when applying lotions, creams, or other beauty products, as they can potentially dull the holographic or iridescent effect.
Safely Removing the Nail Effects
When the time comes to remove your holographic or iridescent nail effects, it’s important to do so without causing damage to your nails. Start by soaking a cotton pad or cotton ball in nail polish remover. Place the saturated cotton pad on each nail and wrap it with aluminum foil to create a secure wrap. Let the nail soak for about 10-15 minutes before gently sliding off the nail wrap, taking care not to scrape or peel off the polish. Once the polish is removed, moisturize your nails and cuticles with a nourishing oil or cream.
Inspiring Holographic and Iridescent Nail Designs
Rainbow Holographic Nails
Create a vibrant and mesmerizing look by combining different holographic shades to achieve a rainbow effect. Apply each holographic shade to a different nail or create a gradient effect by sponging the colors onto each nail. Seal the design with a high-quality top coat to enhance the holographic effect and add shine.
Galaxy-Inspired Iridescent Nails
Capture the beauty of the cosmos with galaxy-inspired iridescent nails. Begin by applying a dark base color, such as navy blue or black, to represent the night sky. Then, use a thin brush or a sponge to dab iridescent polish or powder onto the nails to create the look of stars, nebulae, and galaxies. Finish off with a top coat to seal the design and add depth to the iridescent effect.
Mermaid Scales Nail Art
Embrace your inner mermaid with mermaid scales nail art. Apply a holographic or iridescent base color to represent the shimmering scales. Then, using a small nail brush or a detail brush, create the scales by painting small curved lines or dots in a contrasting holographic or iridescent shade. Leave some spaces between the scales to mimic the natural pattern of fish scales. Finish off with a top coat to seal the design and add shine.
Ombre Holographic or Iridescent Nails
Achieve a gradient effect with holographic or iridescent shades by creating ombre nails. Start with a light holographic or iridescent shade at the base of the nail and gradually blend it into a darker shade towards the tip. Use a sponge or a brush to gently dab the colors onto the nails, ensuring a seamless transition between shades. Finish off with a top coat to seal the design and enhance the holographic or iridescent effect.
With these tips and techniques, you can easily achieve stunning holographic and iridescent nail effects. Whether you prefer holographic nail polish, nail stamping, nail decals, or DIY methods, there are countless possibilities for creating unique and eye-catching manicures. So embrace your creativity, have fun, and get ready to shine with holographic and iridescent nails!


