If you’ve ever marveled at those stunning water marble nail designs and wondered how you could create them yourself, wonder no more! In this article, you’ll uncover the secrets and step-by-step process to master the art of water marble nail design. With a few simple tips and tricks, you’ll be creating mesmerizing nail art that will have everyone asking, “How did you do that?” So, grab your favorite nail polish colors and let’s dive into the world of water marble nail design together!
Hiring: Chat Job with FB Messenger $25/hour. See Requirements Now
Choosing the Right Materials
Quality Nail Polish
When it comes to water marble nail design, using high-quality nail polish is crucial. Look for polishes that have a smooth and thin consistency, as this makes them easier to work with and helps the colors spread well in the water. Brands that specifically state that they are water marbling-friendly are a good option to consider.
Water
Water is the main medium used in water marble nail design, so it’s important to choose the right type. Distilled or filtered water is ideal, as it eliminates impurities that could affect the final result. Additionally, using room temperature water rather than cold water can help the nail polish spread more easily.
Toothpicks or Dotting Tool
Toothpicks or dotting tools are essential for creating intricate designs in your water marble nails. They allow you to manipulate the nail polish in the water and create beautiful patterns. Toothpicks are a more cost-effective option, while dotting tools offer more precision and control.
Tape or Liquid Latex
Tape or liquid latex are used to protect the skin around the nails from getting covered in polish during the marbling process. Apply the tape or liquid latex around your nails, leaving only the nail exposed. This makes cleaning up any excess nail polish much easier and ensures a neater final look.
Cotton Swabs or Q-tips
Cotton swabs or Q-tips are handy tools for cleaning up any mistakes or excess nail polish around the nails. Dip a cotton swab or Q-tip in nail polish remover and gently go around the edges of your nails to remove any smudges or polish that may have transferred to the skin.
Prepping Your Nails
Before you begin the water marble nail design process, it’s important to properly prep your nails. Remove any old polish and gently file your nails into your desired shape. Push back your cuticles and lightly buff the surface of your nails to create a smooth base for the polish.
Preparing Your Workspace
Covering Your Surface
To protect your workspace from any potential spills or messes, it’s a good idea to cover your surface with an old towel, newspaper, or a disposable tablecloth. This will make the cleanup process much easier and prevent any damage to your furniture or countertops.
Setting Up Your Tools
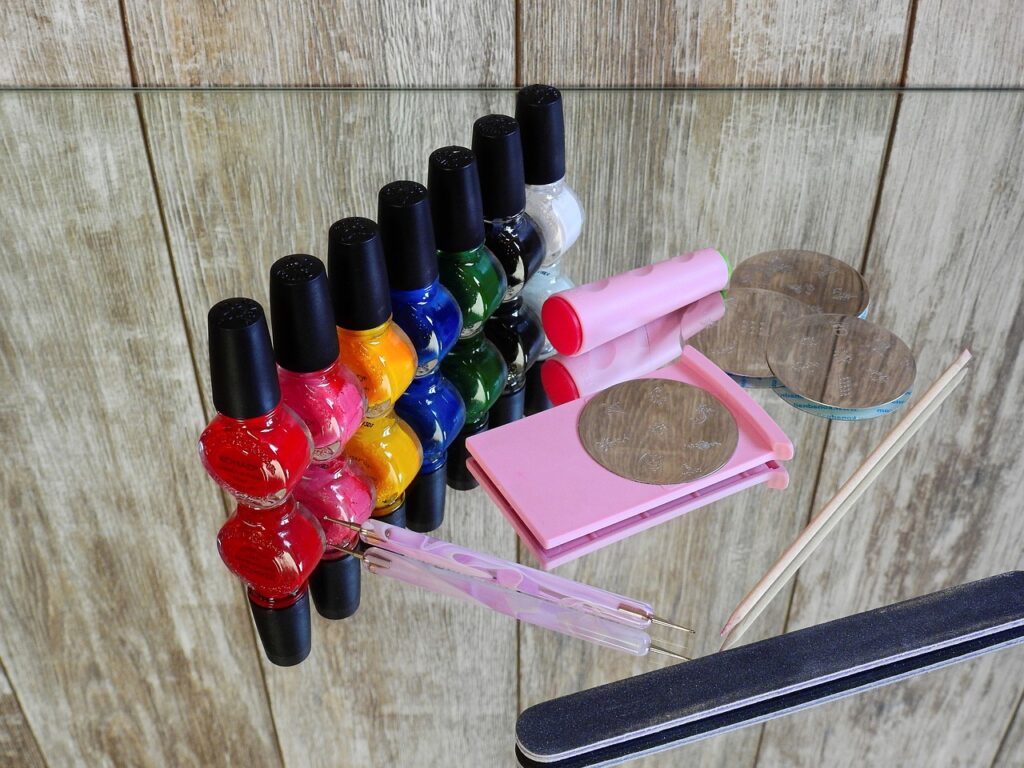
Before diving into the water marble nail design process, make sure you have all your tools organized and easily accessible. Arrange your nail polishes, toothpicks or dotting tools, tape or liquid latex, cotton swabs or Q-tips, and any other supplies you’ll need in a neat and organized manner. Having everything within reach will make the process smoother and more enjoyable.
Gathering Inspiration
Take some time to gather inspiration for your water marble nail design. Browse through magazines, search online, or look for nail art books to find patterns and color combinations that inspire you. Don’t be afraid to get creative and experiment with different designs, or even come up with your own unique patterns. Having a clear vision of what you want to achieve will make the process more enjoyable and help you create stunning water marble nails.
Creating the Base
Applying a Base Coat
Applying a base coat is an important step in any nail design, and water marble nails are no exception. The base coat creates a smooth and even surface for the nail polish to adhere to, and it also helps protect your natural nails from any potential staining. Apply a thin layer of base coat to all your nails and let it dry completely before moving on to the next step.
Choosing Your Color Palette
Selecting the right colors for your water marble design is crucial to achieving a visually appealing result. Consider using colors that complement each other or create a striking contrast. Play around with different combinations and find what works best for your desired look. Experimenting with various shades and finishes, such as metallic or glitter polishes, can add depth and dimension to your design.
Applying the Base Color
Once your base coat is dry, it’s time to apply the base color onto your nails. Choose one of the colors from your chosen palette and apply a thin layer onto each nail. This base color will serve as the background for your water marble design. Allow the base color to dry completely before moving on to the next steps of the process.
Creating the Water Marble Design
Prepping the Water
Fill a shallow dish or container with room temperature water, leaving enough space for dropping in the nail polish. Make sure the water is deep enough to fully submerge your fingertip. It’s a good idea to have some paper towels nearby to clean the surface of the water between each marbling attempt, as this helps prevent any unwanted residue from interfering with your design.
Adding Drops of Nail Polish
Now comes the fun part – adding drops of nail polish to create the marble effect. Select one of the colors from your palette and hold the brush just above the surface of the water. Gently tap the brush to release a small drop of polish into the water. Repeat this step with your other chosen colors, alternating between them to create a unique pattern. The polish will spread on the water’s surface, creating beautiful concentric circles.
Creating Patterns
Using a toothpick or dotting tool, gently drag it through the circles of nail polish to create patterns and designs. This is where your creativity comes into play. You can create swirls, flower-like shapes, or any other design that catches your eye. Don’t be afraid to experiment and try different techniques to achieve the desired pattern.
Manipulating the Design
If you’re not satisfied with the initial pattern, don’t worry! You have some control over the design. Use a toothpick or dotting tool to create additional patterns or swirls by dragging the polish around. Just remember not to overdo it, as excessive manipulation can cause the design to become muddled.
Marbling Your Nails
Protecting Your Skin
Before dipping your nails into the water, use tape or liquid latex to protect the skin around your nails. Apply the tape or liquid latex around the entire perimeter of your nails, leaving only the nail surface exposed. This step helps prevent the polish from adhering to your skin and makes the cleanup process much easier.
Dipping Your Nails
With your skin protected, it’s time to marble your nails. Position your finger above the water’s surface and gently dip it into the patterned polish. Aim to submerge your entire nail into the water, ensuring that the design fully adheres to the nail’s surface. Slowly lift your finger out of the water and marvel at the beautiful marbled design that transfers onto your nail.
Cleaning Up Excess Polish
After removing your finger from the water, you may notice some excess polish remaining on the surface of the water or on your finger. Use a toothpick or another clean tool to gently remove the excess polish before dipping your next finger. This step ensures that each nail will have a fresh and clean transfer of the design.
Repeating the Process
Continue the marbling process by repeating the steps for each of your remaining nails. Remember to clean the surface of the water between each marbling attempt to remove any leftover polish and prevent it from interfering with your design. Take your time and enjoy the process, as each nail creates a unique and stunning water marble effect.
Finishing Touches
Removing Tape or Liquid Latex
Once you have marbled all your nails and your design has fully dried, it’s time to remove the tape or liquid latex that protected your skin. Gently peel away the tape or liquid latex from around your nails, being careful not to smudge the design. This step reveals your beautifully marbled nails in all their glory.
Cleaning Edge of the Nail
After removing the tape or liquid latex, you may notice some residual polish on the skin around your nails. Dip a cotton swab or Q-tip in nail polish remover and carefully clean up any smudges or excess polish. This step ensures a clean and professional-looking finish.
Applying Top Coat
To seal and protect your water marble design, apply a layer of top coat onto each nail. This step not only enhances the shine and vibrancy of the design but also helps to prolong its lifespan. Apply the top coat with smooth and even strokes, covering the entire nail surface. Make sure to encapsulate the marbled design to prevent any chips or fading.
Cleanup and Final Steps
Once the top coat is dry, take a moment to clean up any stray polish that may have transferred onto your skin or cuticles. Dip a clean brush or cotton swab in nail polish remover and gently remove any mistakes. Finally, admire your stunning water marble nail design and show off your creative artistry!
Troubleshooting Tips
Polish Not Spreading in Water
If you’re having trouble getting the nail polish to spread on the water’s surface, try using a different brand or consistency of polish. Thicker or glittery polishes may not work as well for water marble nail design. You can also try using room temperature water, as colder water can sometimes cause the polish to thicken and not spread easily.
Designs Not Transferring to Nail
If the design isn’t fully transferring to your nail, it may be because the polish has dried too much before you dip your finger into the water. Be sure to dip your nail as soon as possible after creating the design to ensure a clean transfer. Additionally, make sure your nails are properly prepped with a base coat and that you’re using high-quality polishes.
Polish Drying Too Quickly
To prevent the nail polish from drying too quickly while creating your design, work in a cool and well-ventilated area. Avoid placing the water dish near direct sunlight or heat sources, as this can cause the polish to dry too fast. You can also add a drop of nail polish thinner to the polish before dropping it into the water to slow down the drying process.
Getting Air Bubbles in Design
If you notice air bubbles forming within the water marble design, it may be due to excessive shaking of the nail polish bottles or too much movement in the water. To minimize air bubbles, gently roll the nail polish bottles between your palms instead of shaking them vigorously. When dropping the polish into the water, try to keep it as still as possible to avoid creating bubbles.
Experimenting with Variations
Using Different Nail Polish Finishes
Water marble nail design doesn’t have to be limited to traditional cream or glossy nail polishes. Experiment with different finishes such as metallic, holographic, or even matte polishes to create unique and eye-catching effects. Mixing different finishes within the same design can add depth and visual interest to your water marble nails.
Trying Different Water Marble Techniques
There are various techniques you can explore to create different water marble effects. Rather than dropping the nail polish directly onto the water’s surface, you can try creating a bullseye pattern or using a needle to drag the polish into intricate designs. Additionally, you can experiment with different dipping techniques, such as swirling patterns or partial dips, to achieve distinct looks.
Adding Additional Designs or Accents
Once you’ve mastered the basics of water marble nail design, don’t be afraid to incorporate other nail art techniques or designs into your marbled nails. You can add accent nails with glitter, foil, or nail stickers, or even experiment with freehand painting to create intricate details. Mixing and matching different nail art styles can result in stunning and unique manicures.
Caring for Your Water Marble Nails
Protecting Your Nails
To maintain the longevity of your water marble designs, it’s important to protect your nails. Avoid activities that could cause excessive damage to your nails, such as opening cans or typing aggressively without proper protection. Wearing gloves when doing household chores or using your nails as tools can help preserve your beautiful water marble nails.
Maintaining Your Design
To keep your water marble nails looking fresh and vibrant, apply a new layer of top coat every few days. This helps to seal the design and prevent any chipping or fading. Avoid excessive exposure to water, especially hot water, as it can weaken the top coat and cause the design to slowly deteriorate. Moisturize your cuticles regularly to keep them healthy and prevent any dryness or peeling.
Removing the Water Marble Design
When you’re ready for a new look, the process of removing water marble nail design is similar to removing any other nail polish. Soak a cotton ball or pad in nail polish remover and place it on your nail, then wrap it with aluminum foil to hold it in place. Let it sit for a few minutes before gently sliding off the foil and wiping away the leftover polish. If any residue remains, use a gentle buffing motion with a nail buffer to remove it completely.
Taking Water Marble Nail Design to the Next Level
Creating Intricate Patterns
Once you’ve mastered the basics, challenge yourself by experimenting with more intricate patterns and designs. Use smaller brushes or toothpicks to create delicate details within your water marble nails, or try mixing and matching different patterns for a visually dynamic look. Practicing different techniques and taking your time will help you achieve beautifully detailed water marble designs.
Incorporating Nail Stamping
Nail stamping is a technique that allows you to transfer detailed designs from stamping plates onto your nails. You can use water marble nail design as a base and then add stamped designs on top to create a unique and layered effect. Nail stamping opens up a whole new realm of possibilities for creating intricate and complex nail art.
Using Multiple Colors
While the traditional water marble technique typically involves using a few colors, don’t be afraid to push the boundaries and use multiple colors in your design. Experiment with gradient effects, ombre transitions, or even rainbow-inspired designs by dropping multiple colors onto the water’s surface and manipulating them to create stunning combinations.
Combining Water Marble with Other Nail Art Techniques
Water marble nail design serves as an excellent base for incorporating other nail art techniques. Add rhinestones, decals, or stickers to your marbled nails to create a more dimensional and eye-catching look. You can also experiment with different nail art brushes, like fan brushes or striping brushes, to add textured or linear designs to complement your water marble base.
Mastering the art of water marble nail design takes time and practice, but with the right materials, techniques, and creativity, you can create stunning and intricate designs on your own nails. Enjoy the process, let your creativity flow, and embrace the uniqueness that water marble nails bring to your manicure. Happy marbling!


