If you’re tired of your beautiful nail art chipping and losing its shine within a few days, then fret no more because we have the solution for you. Discover the secret to making your nail art last longer by using top coats and sealers. These magical products not only protect your nails from chipping and fading, but also add an irresistible glossy finish that will make your manicure pop. Say goodbye to frustrating touch-ups and hello to a longer-lasting, salon-worthy nail art that will make heads turn. Dive into the world of top coats and sealers and unlock the secrets to a flawless and durable manicure.
Hiring: Chat Job with FB Messenger $25/hour. See Requirements Now
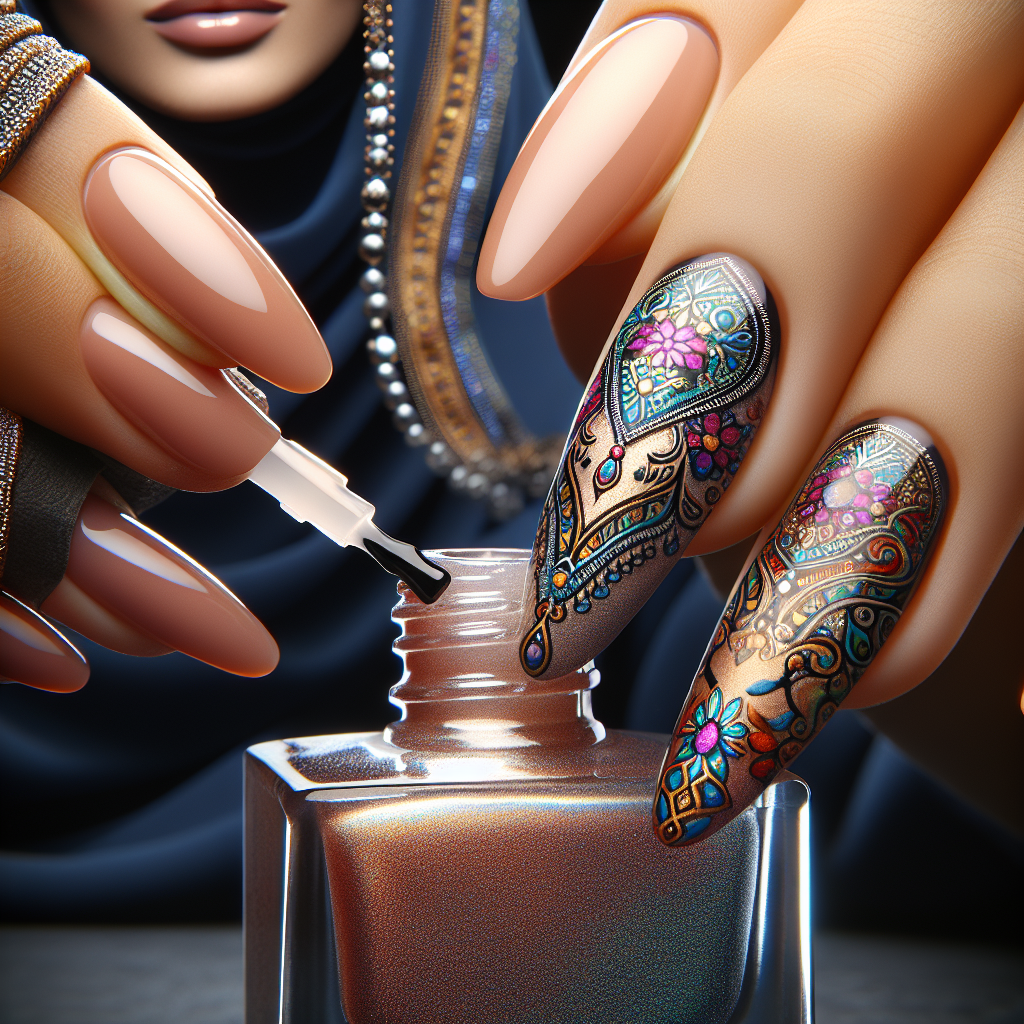
Choosing the Right Top Coat
Understanding the Purpose of a Top Coat
When it comes to nail art, a top coat serves as the final layer of protection and finish for your design. It is designed to enhance the longevity and durability of your nail art by safeguarding it against chips, smudges, and scratches. A top coat also adds a glossy shine to your nails, giving them a polished and professional look.
Different Types of Top Coats Available
There are various types of top coats available on the market, each with its own unique qualities and benefits. Some common types include quick-drying top coats, high-shine top coats, gel-like top coats, and matte top coats. Quick-drying top coats are perfect for those who are always on the go and don’t have much time to wait for their nails to dry. High-shine top coats provide a lustrous finish, while gel-like top coats mimic the appearance of gel nails without the need for UV lamps. Matte top coats, on the other hand, give your nails a trendy and velvety finish.
Evaluating the Ingredients
When choosing a top coat, it is important to take a look at the ingredients list. Avoid top coats that contain harmful chemicals such as formaldehyde, toluene, and DBP (dibutyl phthalate), as these can potentially damage your nails and cause adverse health effects. Look for top coats that are free from these harmful ingredients and opt for ones that are enriched with nourishing ingredients like vitamins and oils, which can help promote healthy nail growth.
Preparing Your Nails
Cleaning and Removing Old Polish
Before applying a top coat, it is essential to clean your nails and ensure that they are free from any old polish residues. Use a gentle nail polish remover and cotton pads to remove the previous color thoroughly. Make sure to swipe the cotton pad in one direction to avoid spreading any residue.
Trimming and Shaping Your Nails
Next, you’ll want to trim and shape your nails to the desired length and shape. Use a nail clipper to trim your nails and a nail file to shape them. The most popular nail shapes are square, oval, round, and almond. Choose the one that best suits your style and preferences.
Buffing and Smoothing the Nail Surface
To achieve a smooth and even surface for your top coat, it is important to buff your nails gently. This step helps to remove any ridges or bumps that may be present on your nails, ensuring a flawless application of the top coat. Use a nail buffer or a gentle nail file to gently buff the surface of your nails.
Applying the Base Coat
Benefits of Using a Base Coat
Using a base coat is an important step in any nail art routine. It acts as a protective barrier between your nails and the nail polish, preventing staining and yellowing. A base coat also helps the nail polish adhere better to the nail surface, enhancing its longevity.
Selecting a Suitable Base Coat
When choosing a base coat, opt for one that is specifically formulated for your nail type and concerns. For example, if you have weak or brittle nails, look for a strengthening base coat that can help nourish and fortify your nails. If you have sensitive nails, consider using a hypoallergenic base coat to minimize the risk of irritation.
Proper Application Techniques
Apply a thin and even layer of the base coat to each nail, making sure to cover the entire surface. Start from the base of the nail and move towards the tip, using gentle strokes. Allow the base coat to dry completely before moving on to the next step. This will ensure a smooth and flawless base for your nail polish and top coat.
Mastering the Art of Nail Polish Application
Choosing the Right Nail Polish
When it comes to selecting a nail polish, there are countless colors and finishes to choose from. Consider the occasion, your personal style, and current trends when making your selection. It is also essential to choose a high-quality nail polish that is long-lasting and chip-resistant. Look for brands that offer a wide range of shades and formulas to meet your preferences.
Applying Thin Layers for Longevity
To extend the longevity of your nail art, it is crucial to apply thin layers of nail polish. Thick layers take longer to dry and are more prone to smudging and chipping. Start with a thin coat of polish and allow it to dry before applying a second or third layer if desired. This will ensure a smooth and even application, resulting in a longer-lasting manicure.
Avoiding Common Mistakes
There are a few common mistakes to avoid when applying nail polish. Do not shake the bottle vigorously, as this can create air bubbles that can ruin the finish of your nails. Instead, gently roll the bottle between your hands to mix the polish. Additionally, avoid painting all the way up to the cuticle and sides of the skin, as this can lead to premature chipping. Leave a small gap around the edges of your nails for a clean and long-lasting manicure.
Understanding Top Coat and Sealer Differences
What Differentiates a Top Coat from a Sealer?
While a top coat and a sealer may seem similar, they serve different purposes in the nail art world. A top coat is applied as a final layer to protect and enhance the appearance of your nail art. It adds shine and extends the life of your manicure. On the other hand, a sealer is typically used specifically for nail art designs, such as nail stamps or decals. It acts as a barrier to seal the design in place and protect it from smudging or fading.
Benefits of Using a Top Coat
Using a top coat provides a multitude of benefits. It not only prolongs the life of your nail art but also enhances its shine and vibrancy. A top coat can also help prevent chipping, smudging, and scratching, ensuring that your manicure looks fresh and flawless for an extended period.
Benefits of Using a Sealer
If you enjoy intricate nail art designs, a sealer is a must-have. It works hand-in-hand with your top coat to ensure the longevity and intactness of your design. A sealer prevents smudging, bleeding, and fading, allowing your nail art to remain vibrant and eye-catching. Additionally, a sealer can create a smooth and glossy finish, giving your design that professional touch.
Investing in Quality Nail Products
Researching Trusted Brands
When it comes to nail products, investing in trusted brands can make a significant difference in the quality and longevity of your nail art. Research brands that are known for their high-quality formulas, long-lasting wear, and vibrant pigments. Look for customer reviews and recommendations to ensure that you are purchasing products that deliver on their promises.
Checking for Long-lasting Formulas
One of the key factors in making your nail art last longer is using nail products with long-lasting formulas. Check the product labels and descriptions for phrases such as “chip-resistant,” “long-wear,” or “extended wear.” These indicate that the product is designed to withstand the daily activities and challenges that can cause chipping and fading.
Considerations for Vegan and Cruelty-free Products
If you follow a vegan lifestyle or prefer to use cruelty-free products, consider looking for nail brands that align with your values. Many brands now offer vegan and cruelty-free options, ensuring that you can enjoy beautiful and long-lasting nail art without compromising your principles.
Proper Application Techniques for Top Coats
Applying Thin and Even Layers
The key to a flawless top coat application is applying thin and even layers. Using too much product can result in a thick and gloopy finish that takes longer to dry and is prone to smudging and chipping. Instead, use a light hand and apply thin layers, ensuring that the entire nail surface is covered. Repeat the process if necessary, allowing each layer to dry before applying the next.
Avoiding Overlapping and Smudging
Take your time when applying a top coat to avoid overlapping and smudging. Overlapping can cause the layers to become uneven and result in a lumpy or streaky finish. To avoid this, carefully apply the top coat in one direction, starting from the base of the nail and moving towards the tip. Be patient and allow the top coat to dry completely before proceeding with any further activities.
Ensuring Sufficient Drying Time
Proper drying time is crucial to ensure the longevity of your nail art. Rushing through the drying process can lead to smudged or dented nails. Allow your nails ample time to air dry or use a quick-drying spray or drops to speed up the process. Remember, patience is key when it comes to achieving a flawless and long-lasting manicure.
Extending the Longevity of Nail Art
Avoiding Harsh Chemicals and Rough Activities
To keep your nail art looking its best for as long as possible, it is important to avoid harsh chemicals and activities that can cause damage. Chemicals such as bleach, acetone, and harsh cleaning agents can weaken and fade your nail polish. Additionally, rough activities like gardening or cleaning without gloves can lead to chips and cracks in your nail art. Protect your nails by wearing gloves when engaging in tasks that could potentially damage them.
Using Gloves for Protection
Wearing gloves when performing household chores or anytime you’re exposed to water, cleaning products, or other harsh substances can significantly extend the life of your nail art. Gloves act as a barrier, preventing direct contact between your nails and potentially damaging elements. They also help protect your skin from drying out and your nails from becoming brittle.
Maintaining Regular Nail Care
Regular nail care is essential for the longevity of your nail art. Keep your nails clean and moisturized by using a gentle nail cleanser and a nourishing cuticle oil. Trim any loose or damaged cuticles to promote healthy nail growth. Additionally, avoid using your nails as tools to prevent breakage. By maintaining good nail care habits, you’ll help your nail art last longer and keep your nails in optimal condition.

Tips for Removing and Changing Nail Art
Safe Nail Polish Removal Techniques
When it’s time to remove your nail art, it’s important to do so in a safe and gentle manner. Soak a cotton pad with nail polish remover and place it over the nail, allowing it to sit for a few seconds. Gently swipe the cotton pad across the nail in one direction to remove the polish. Avoid rubbing or scrubbing, as this can damage the nail surface and surrounding skin.
Preventing Nail Damage during Removal
To prevent damage to your nails during removal, ensure that you are using an acetone-free nail polish remover. Acetone can strip the nails of natural oils, leaving them dry and brittle. Additionally, avoid forcefully scraping or peeling off the nail polish, as this can cause the top layer of your nail to peel or chip. Be patient and gentle during the removal process to maintain the health of your nails.
Efficient Ways to Change Nail Art
If you enjoy changing your nail art frequently, consider using peel-off base coats or nail wraps. Peel-off base coats are designed to be easily removed without the need for acetone, allowing you to change your nail art as often as you like. Nail wraps, on the other hand, offer a quick and effortless way to achieve intricate designs without the need for nail polish. Simply apply the wrap to your clean and dry nails, trim off the excess, and seal with a top coat for a long-lasting finish.
Problems and Troubleshooting
Solving Common Chipping Issues
If you find that your nail art is prone to chipping, there are a few troubleshooting tips to consider. Firstly, make sure you are applying thin and even layers of nail polish and top coat to avoid excessive thickness, which can lead to chipping. Secondly, ensure that each layer is fully dry before moving on to the next, as wet layers can easily smudge and chip. Lastly, protect your nails from harsh chemicals and rough activities that can weaken the integrity of your nail art.
Dealing with Smudging and Imprints
Smudging and imprints can be frustrating after spending time and effort on your nail art. To prevent smudging, make sure each layer of polish is thoroughly dry before applying the next. Using a quick-drying top coat can help speed up the drying process. If you accidentally smudge your nails, gently buff the affected area and apply another thin layer of nail polish and top coat to smooth out the imperfections.
Repairing Damaged Nail Art
In the unfortunate event of damaged nail art, there are methods to salvage your manicure. If you experience a small chip, use a fine-grained nail file or a buffer to gently smooth out the rough edges. Apply a thin layer of nail polish and a top coat to seal the repaired area. For more significant damages, consider removing the nail polish, repairing the nail with a nail repair kit or a nail strengthener, and starting fresh with a new design.
With these tips and techniques, you can ensure that your nail art lasts longer and looks flawless. Remember to choose the right top coat, prepare your nails properly, and invest in quality nail products. By mastering proper application techniques and understanding the differences between top coats and sealers, you’ll be able to enjoy vibrant and long-lasting nail art. Extend the longevity of your manicure by practicing proper care and protection, and don’t forget the essential tips for removing and changing your nail art. Troubleshoot common problems and keep your nails looking beautiful with a little bit of patience and attention to detail.


