You’re getting ready for a glamorous evening out, and you want to make a statement with your makeup. Look no further than the timeless and alluring smoky eyes! With their sultry and mysterious appeal, smoky eyes are the perfect way to elevate your look. But how can you achieve this coveted style without it looking like a muddled mess? In this article, we’ll guide you through the step-by-step process of creating smoky eyes that will leave everyone mesmerized. Get ready to make heads turn with your stunning evening look!
Check here to see how this cup of morning coffee will bright your whole day!!
Choosing the Right Eyeshadow Colors
When it comes to creating a stunning smoky eye look, choosing the right eyeshadow colors is crucial. Understanding the color wheel will help you pick complementary shades that will enhance your eyes and create a harmonious look.
Understanding the Color Wheel
The color wheel is a handy tool that can guide you in selecting the perfect eyeshadow colors. It consists of 12 colors that are arranged in a circular pattern. The basic principle is that colors located directly opposite each other on the wheel are complementary, meaning they create a striking contrast when paired together.
For a classic smoky eye, you can’t go wrong with pairing warm tones (such as browns and golds) with cool tones (such as grays and silvers). These complementary colors will make your eyes pop and add depth to your look.
Selecting Complementary Colors
To begin creating your smoky eye, choose a medium-toned shade as your base color. This shade should be complementary to your eye color and act as a transition between the other eyeshadow colors you will apply. For example, if you have blue eyes, a warm, golden brown shade would be an excellent choice.
Next, select a darker shade that will add depth and drama to your look. This color should be a few shades darker than your base color and should create a seamless gradient when blended together. For a bold smoky eye, consider using a deep black or charcoal shade.
Lastly, choose a shimmery shade to add a touch of glamour and highlight to your lids. This shade should be lighter than your base color and can be a metallic or iridescent shade. A champagne or silver shade works well for most skin tones.
Considering Your Eye Color
While the color wheel is a helpful guide for selecting eyeshadow colors, it’s important to consider your eye color as well. Certain shades can enhance the natural color of your eyes and make them stand out even more.
- Blue eyes: Bronze, copper, and warm browns can make blue eyes pop.
- Green eyes: Purple, plum, and mauve shades can enhance the green in your eyes.
- Brown eyes: Gold, bronze, and deep blues can bring out the richness of brown eyes.
- Hazel eyes: Warm taupes, burgundies, and greens can complement the different colors in hazel eyes.
Use these suggestions as a starting point, but feel free to experiment and find the eyeshadow colors that truly make your eyes shine.
Prepping Your Eyelids
Before diving into the eyeshadow application, it’s essential to prep your eyelids properly. This step ensures that the eyeshadow goes on smoothly, lasts longer, and appears vibrant.
Cleaning and Moisturizing
Start by gently cleansing your eyelids to remove any excess oils or makeup residue. A gentle makeup remover or micellar water will do the trick. Once cleaned, apply a moisturizer specifically formulated for the eye area. This step helps to keep your eyelids hydrated and prevents creasing.
Applying Eyeshadow Primer
To prolong the wear of your eyeshadow and enhance the color payoff, it’s essential to apply an eyeshadow primer. This product creates a smooth base, evens out the skin tone of your eyelids, and prevents the eyeshadow from creasing or fading throughout the day. Simply apply a small amount of primer and blend it thoroughly across your lids using your fingertips or a brush.
Creating a Base
To achieve a flawless smoky eye, you need to create a solid base. This involves applying a transition shade and adding a lighter base shade to create depth and dimension.
Applying a Transition Shade
A transition shade acts as a bridge between the other eyeshadow colors by blending the different shades seamlessly. It is typically a matte shade that is slightly darker than your skin tone. Using a fluffy blending brush, apply the transition shade to the crease of your eye and blend it gently back and forth in windshield wiper motions. This will soften any harsh lines and create a natural gradient.
Adding a Lighter Base Shade
Next, apply a lighter shade over your entire eyelid up to the brow bone. This shade acts as a base color to make the other eyeshadows pop. Use a flat eyeshadow brush to pat the color onto your lid, ensuring that it is evenly distributed. This step provides a clean canvas for the darker shades and helps to intensify the smoky effect.
Adding Depth and Drama
The key to achieving a sultry smoky eye is to add depth and drama using darker eyeshadow shades. This step involves using a darker shade for the outer V of your eye, blending the colors seamlessly, and applying eyeliner for definition.
Using a Darker Shade for the Outer V
The outer V refers to the outer corner of your eye and the crease area. To add depth and dimension, choose a dark shade that complements your eyeshadow colors and eye shape. Using a small, tapered blending brush, apply the darker shade to the outer V in a V shape and blend it slightly into the crease. This will create a smoldering effect that adds intensity to your look.
Blending the Color Seamlessly
Blending is the secret to a flawless smoky eye. Taking a clean blending brush, gently blend the edges of the eyeshadow colors to create a seamless transition. This step softens any harsh lines and creates a gradient effect. Remember to use light, circular motions to blend the colors together, being careful not to remove too much product.
Applying Eyeliner for Definition
To further define your eyes and intensify the smoky effect, apply eyeliner along your upper lash line. You can use a black or dark brown eyeliner, depending on your preference and the intensity you want to achieve. A gel or pencil eyeliner works well for a smoky eye look. Apply the eyeliner as close to the lash line as possible, starting from the inner corner and working your way to the outer corner. For a more dramatic look, you can also apply eyeliner to your lower lash line, but be sure to blend it for a softer effect.
Adding Shimmer and Highlight
To elevate your smoky eye look and add a touch of glamour, it’s time to incorporate shimmer and highlight. These finishing touches will make your eyes sparkle and catch the light.
Using a Shimmery Shade on the Lid
Select a shimmery eyeshadow shade that complements your eyeshadow colors and suits your skin tone. Using your finger or a flat eyeshadow brush, pat the shimmery shade onto the center of your lid. This will create a focal point and draw attention to your eyes. Avoid applying shimmer to the crease to maintain the smoky effect.
Applying Highlighter to the Inner Corners
To brighten and open up your eyes, apply a touch of highlighter to the inner corners. This area tends to be darker, and adding highlighter will make your eyes appear wider and more awake. Use a small brush or your finger to gently dab the highlighter onto the inner corners and blend it slightly towards the inner part of your lid.
Smudging and Smoking Out
To achieve a truly sultry and smoky effect, it’s essential to smudge and smoke out the eyeshadow. This step involves smudging the lower lash line, blending the colors for a seamless finish, and adding curling and mascara for a full and dramatic look.
Smudging the Lower Lash Line
Using a smudge brush or a small angled brush, take the same darker shade you used for the outer V and apply it to your lower lash line. Begin at the outer corner and gradually work your way towards the inner corner. This will create continuity between your upper and lower lash lines, adding depth and intensity to your smoky eye look.
Blending the Smoky Effect
To ensure a seamless finish, use a clean blending brush to gently blend the eyeshadow colors on your upper and lower lash lines. This will soften any harsh lines and create a cohesive smoky effect. Pay special attention to the outer and inner corners, where the colors should seamlessly merge.
Curling and Applying Mascara
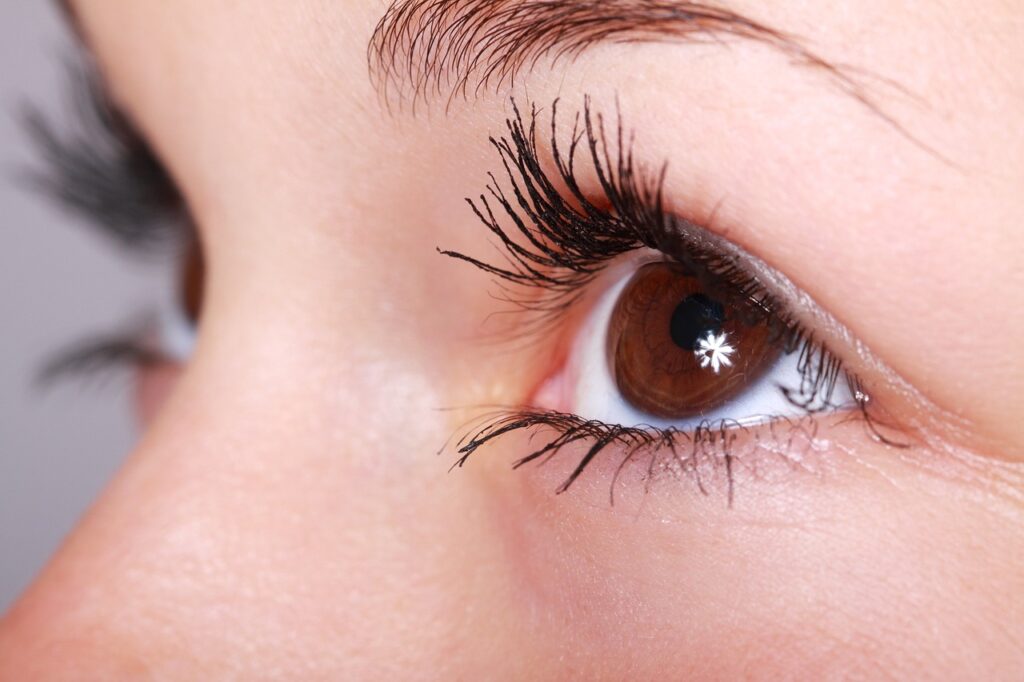
To complete your smoky eye look, curl your lashes using an eyelash curler to add volume and lift. Then, apply several coats of mascara to both your upper and lower lashes. Mascara helps to define your lashes and make them appear thicker, further enhancing the overall smoky eye effect. Opt for a volumizing mascara formula for maximum impact.

Fixing Mistakes and Cleaning Up
Creating a smoky eye can be a messy process, but don’t worry! Fixing mistakes and cleaning up any fallout is a breeze with a few simple tricks.
Removing Excess Shadow
If you experience fallout from the eyeshadow during application, don’t panic. Simply take a clean fluffy brush and gently brush away any excess shadow from under your eyes. You can also use a makeup wipe or a cotton swab dipped in makeup remover to clean up any smudges or mistakes.
Correcting Uneven Lines or Color
If you notice any uneven lines or color distribution, don’t fret. Dip a clean brush into your transition shade and softly blend the areas where you need to make corrections. The transition shade will act as a buffer, helping to blend and correct any mistakes without compromising the overall smoky eye effect.
Finishing Touches
With the bulk of your smoky eye look complete, it’s time to add the finishing touches and perfect your glamorous evening look.
Defining Brows
Well-groomed brows are the perfect complement to a smoky eye. Fill in your brows using a brow pencil or powder that matches your natural hair color. Pay attention to small gaps or sparse areas, and use feather-like strokes for a natural-looking result. Brush through your brows with a spoolie brush to blend the product and ensure a polished finish.
Applying False Lashes (Optional)
For a truly show-stopping look, consider applying false lashes. False lashes add length and volume to your natural lashes, creating a stunning, wide-eyed effect. Choose lashes that suit your eye shape and desired level of drama. Apply lash glue to the lash band and wait a few seconds for it to become tacky. Then, using tweezers or a lash applicator, carefully place the false lashes as close to your natural lash line as possible. Gently press them into place and allow the glue to dry completely.
Setting the Look with Setting Spray
To ensure your smoky eye stays put all night long, finish off your look by setting it with a setting spray. Close your eyes and mist the spray a few times, allowing it to dry naturally. The setting spray will help to lock in your eyeshadow and prevent smudging or fading throughout the evening.
Customizing Your Smoky Eye
While a classic smoky eye is stunning, don’t be afraid to customize the look to fit your personal style. Here are a couple of ways you can make the smoky eye your own:
Using Bold or Colored Eyeshadows
If you’re feeling adventurous, experiment with bold or colored eyeshadows to create a unique smoky eye look. For instance, try using jewel-toned shades like emerald green, sapphire blue, or amethyst purple for a vibrant and eye-catching effect. These shades can add a pop of color to your smoky eye while still maintaining the sultry and dramatic vibe.
Experimenting with Winged Liner
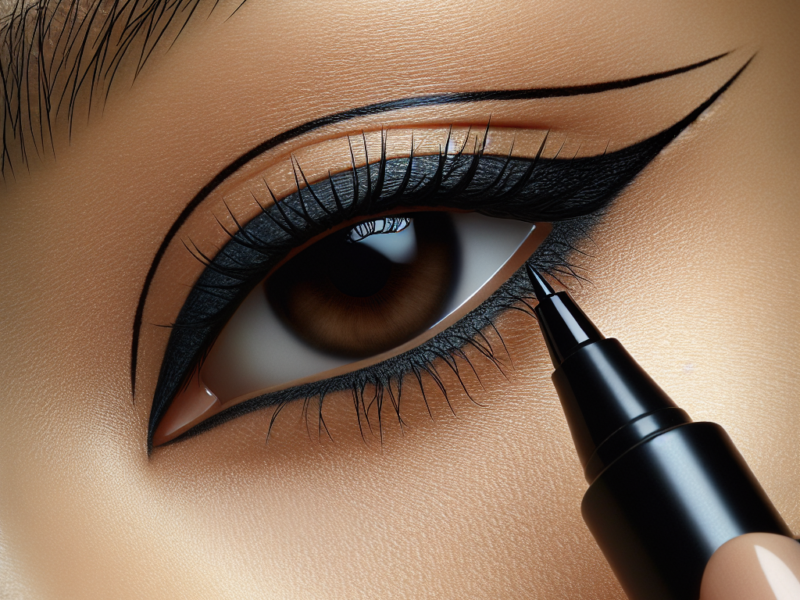
For a modern twist on the classic smoky eye, try adding a winged liner. After applying your eyeshadows and eyeliner along the lash line, extend the liner slightly beyond the outer corner of your eye, flicking it upwards to create a winged effect. This adds a touch of sophistication and drama to your smoky eye, perfect for special occasions or nights out.
Tips and Tricks
Creating a flawless smoky eye may seem like an art form, but with these tips and tricks, you’ll be a smoky eye pro in no time:
Start with a Matte Base
To create a smooth and even base for your smoky eye, start with matte eyeshadows. Matte shades have less fallout and are easier to blend, ensuring a seamless and well-defined look. Once you’ve established your base, you can layer shimmery eyeshadows on top for added glamour.
Blend, Blend, Blend
The secret to a beautiful smoky eye is blending. Take your time to blend each eyeshadow shade meticulously, ensuring there are no harsh lines or uneven color distribution. Blending creates a seamless transition between shades and achieves that coveted smoky effect.
Keep the Rest of Your Makeup Simple
When rocking a smoky eye, it’s best to keep the rest of your makeup simple and understated. Go for a natural-looking foundation, a subtle blush, and a nude or soft pink lipstick. This balance allows your smoky eye to take center stage and ensures your overall look is polished and sophisticated.
With these comprehensive steps, you are now equipped to create a stunning smoky eye look that will make you the star of any evening event. Experiment with different shades, techniques, and finishes to find the smoky eye that suits your unique style and personality. Remember, practice makes perfect, so don’t be afraid to play around and have fun with your makeup.


